Auto Assign Groups
Configure & Edit Auto Assign Groups
- An auto assignment group in the Blitz Sales Follow-Up Software is used to automatically assign web lead and web form leads equally to the configured users in the group. Each Web Lead type can be configured for a different assignment group. So if you have users that handle a specific type of lead and not others, then you can create an assignment group for just those users. Each web form can also be configured to have an auto assign group. Once the lead is assigned to the user, it will be added to their schedule for that date and time. Watch the configuration video on Blitz Tv.
- Administrators can view the list of auto assign groups by navigating to Administration – Auto Assign Groups. By default you will see an auto assign group named Round Robin. To edit the assign group’s name, click the
icon. Type the new name and click save
icon. To delete the assignment group, click the
icon.
- To configure the users that will be a part of the group click the
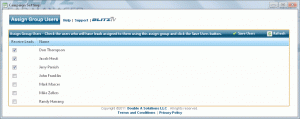
icon. This will open the Assign Group User screen. Check the Receive Leads checkbox for the users that will receive leads as part of this group. Click the Save users button to save the list of users. All users that are checked for a group will receive leads in a round robin fashion. Each user will receive an equal number of leads over time.
- To view the history of all leads that have been assigned using an assign group, click the Assignment History link. This will open the Assign Group History page. This page contains the leads that were assigned, where the lead is from, and who the lead was assigned to when it was created. Each field can be sorted and filtered.
Configuring Web Form Auto Assign Group
- Each Web Form can be configured with a different Auto Assign Group. Navigate to the Administration – Manage Campaigns and select the
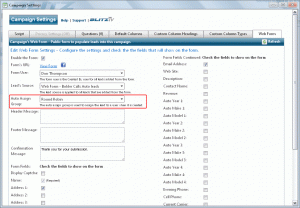
icon for the campaign’s web form you want to configure. Click the Web Form tab, select the Auto Assign Group from the drop-down and click the save button to save the Web Form’s settings.
Configuring Web Lead Setup Auto Assign Group
- Each Web Lead Provider’s lead type can be configured with a different Auto Assign Group. Navigate to the Administration – Web Lead Setup and click the configure link for the lead provider you want to configure. Select the Auto Assign Group from the drop-down for each lead type you want to configure and click the Save Settings button to save the lead provider settings.


