Lead Log Info Box Template
The Lead Log info box can now be customized to include any information from the Lead Details tab. This box is meant to provide a quick view of a contact’s important information without having to navigate to the details tab. To customize the information shown in the box, navigate to Administration > Account Settings, and locate the “Lead Contact Information” box on the bottom right. Here, you can use Lead Substitutions to populate any of the contact details.
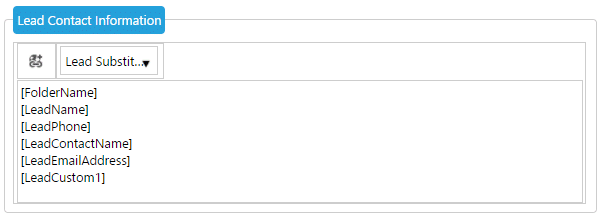
When a lead log is open, you’ll see the substituted data populated:

Checklists
Custom Checklists are now available, allowing you to track important tasks that need to be completed when working with leads, customers, and other contacts. This could include remembering to collect certain information during the sales process, ensuring tasks are being completed after the sale, or any other necessary responsibilities. The items on a checklist can be customized, and multiple checklists can be tracked on one lead in Blitz at a time.
Configuring Checklists
- Navigate to Administration > Checklists.
- To create a new Checklist, click +Add New Checklist in the black bar, create a name for the Checklist, and click the check to save.
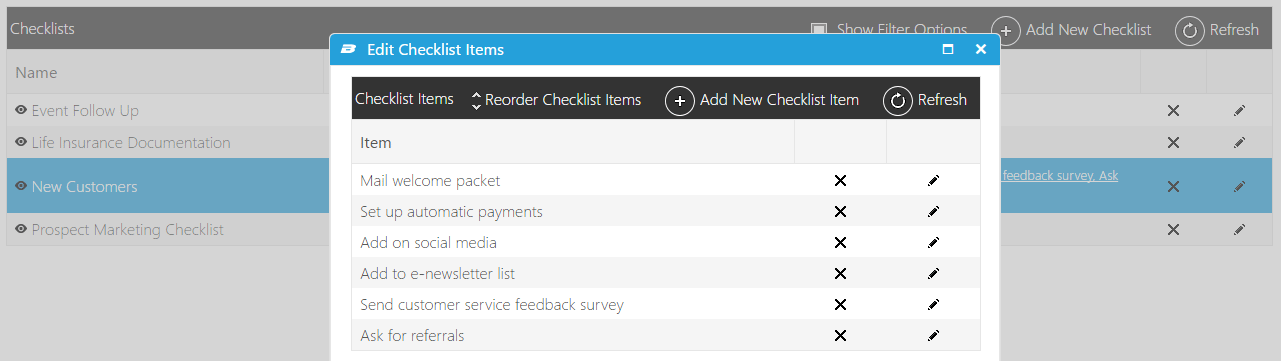
- To add items to a Checklist, click the “No Items Added Yet” link. In the popup, click +Add New Checklist Item, type an item name, and click the check to save. Continue this step for each item.
- To reorder the items on a checklist, click “Reorder Checklist Items.” This allows you to drag the items to the correct order.
- To edit or delete a Checklist, use the X or edit pencil on the main list.
- To view all contacts that are using one of your Checklists, click the eye icon to the left of the Checklist name.

Using Checklists
- Click on a lead name to open their lead log.
- To add a Checklist to this lead, find the “Add New Checklist” dropdown at the top of the screen, and select the Checklist you’d like to add.
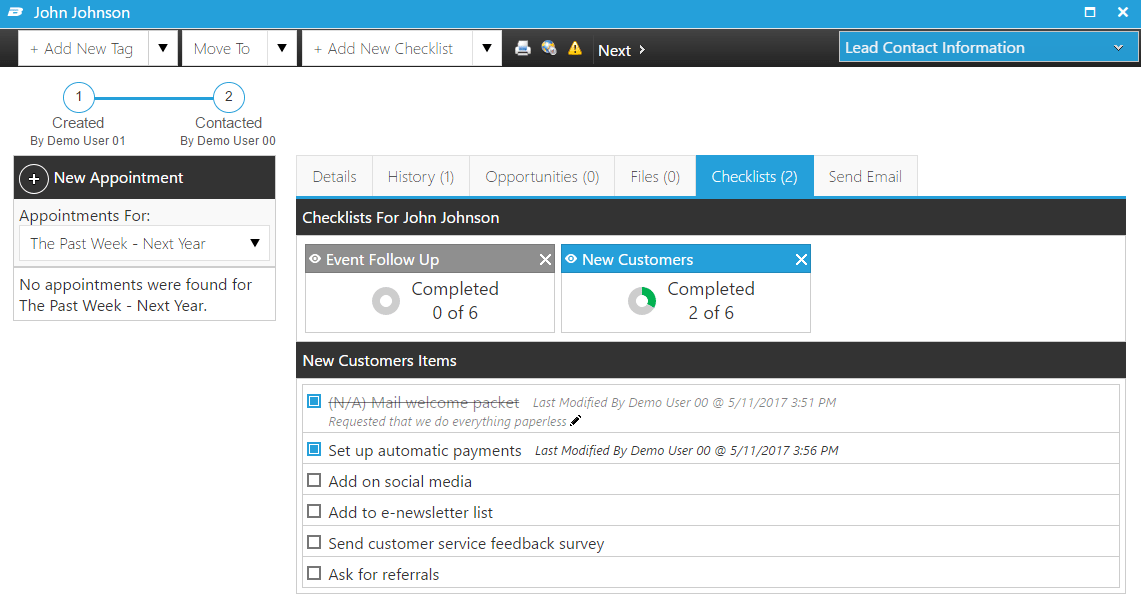
You will not see this dropdown if you have not created any Checklists yet - You’ll immediately be jumped to the Checklists tab within the lead log. At the top of the window, a summary is displayed showing the total items that have been completed. Below, the items are listed for the Checklist.
- To add additional Checklists, simply select another Checklist from the dropdown. You can switch the Checklist being viewed by clicking the Checklist name in the summary box.

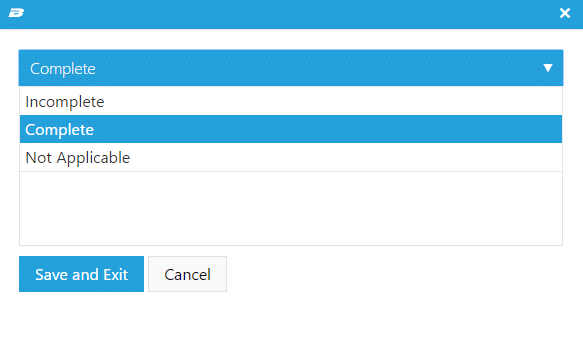
- There are two options for checking an item off a Checklist: Completed or Not Applicable. Completed indicates that the items has been completed, while Not Applicable indicates that the item does not apply to this person or scenario. To check an item, click the checkbox next to the item. A dialogue box will open, so you can select either Complete or Not Applicable, and add a note (note is not required). Incomplete will leave the item unchecked. Click Save and Exit.

- Back on the Checklists, you’ll see your updates reflected. If you added a note, it will be displayed below the checklist item (you can click the edit pencil next to the note to change it). A time stamp is also added to see when that Checklist item was last updated, and by which user. In the summary box above, you’ll see how many items have been checked next to a donut chart showing a visual.


Tracking Checklists
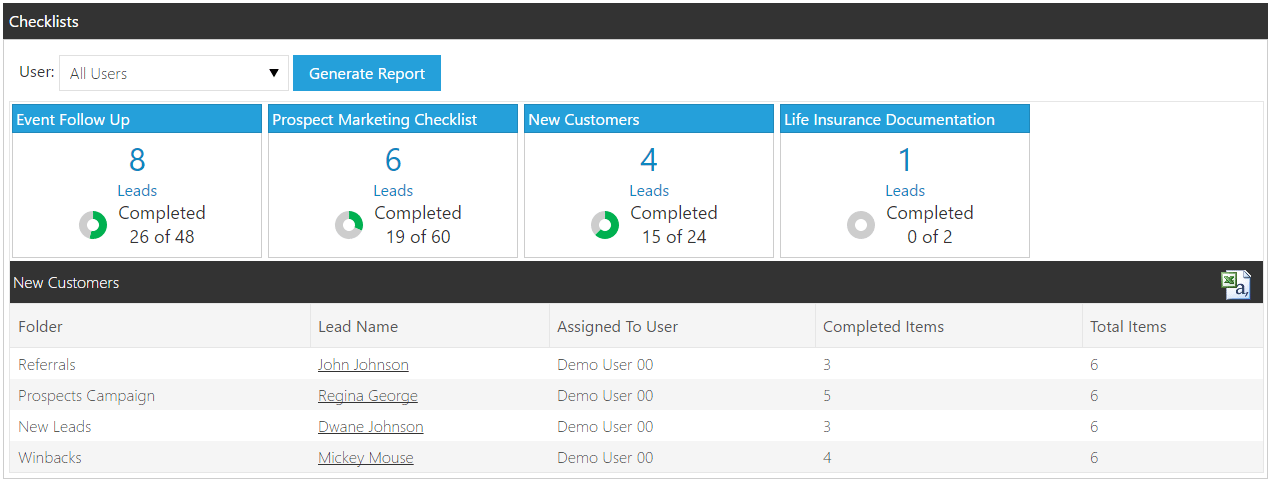
- To see an overview on Checklist progress across all leads, go to Administration > Reports and select the Checklists report. By default, all Checklists are displayed. To narrow down by a particular user’s Checklists, select their name from the User dropdown and click Generate Report.
- Each Checklist that is currently being used is displayed at the top of the report. In each summary box, the number of leads that have that Checklist is displayed, and the total number of items that have been completed.
- To view the leads that have that Checklist, click the “Leads” number (4 Leads for example). This will open a list below with the Leads’ names, who they are assigned to, and now many items have been completed. The list can be sorted by any column by clicking the column header, and can be exported by clicking the Excel icon in the black bar above the list.

Enhancement to Spreadsheet Import Wizard
The spreadsheet import process has been enhanced, displaying each step in a timeline view at the top of the screen. Users can easily move forward and back in the process to make changes prior to importing.
To get to the import screen, navigate to Administration > Spreadsheet.

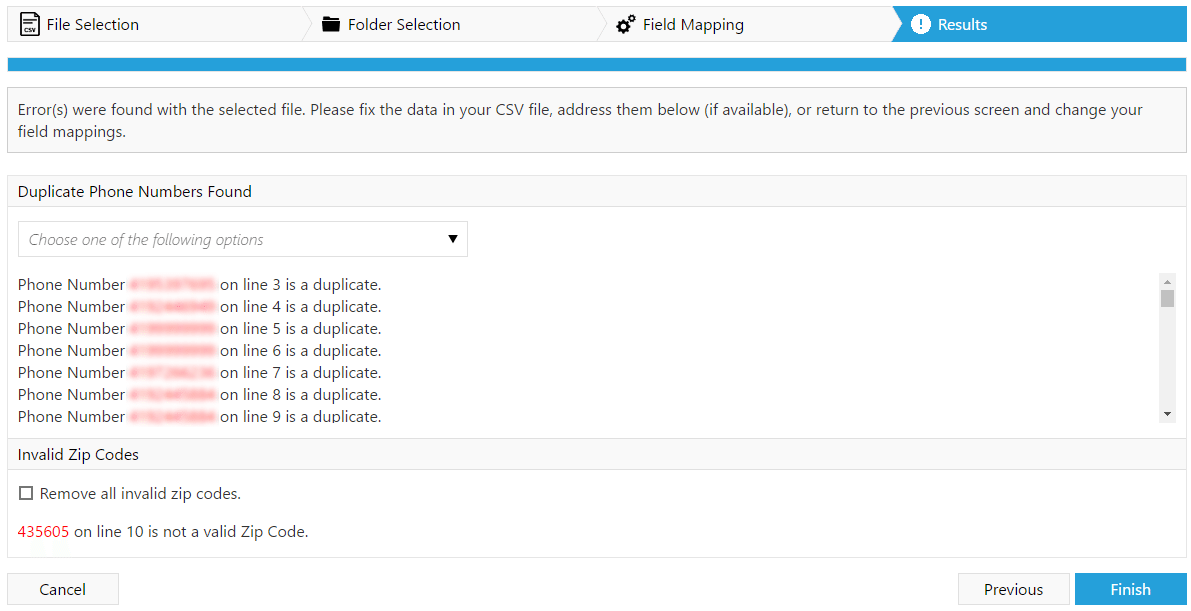
Import errors have been moved to a separate screen, and grouped based on the type of error. This change makes it simpler to handle any bad spreadsheet data prior to completing the import. Cancel brings you back to the first step to start over, Previous brings you back to field mapping, and Finish completes the import after errors are resolved.
Treeing
The ability to tree, or categorize, dropdown items has been added to:
- Email Templates
- Quick Actions
- Questions
- Call Scripts
Treeing allows the dropdown items to be consolidated and organized by category. For example, if you have different products or services, you may group your email templates based on that. This makes them easier to find, as opposed to scrolling through a list. To open a section, simply click the arrow next to the category and the nested items will display below.
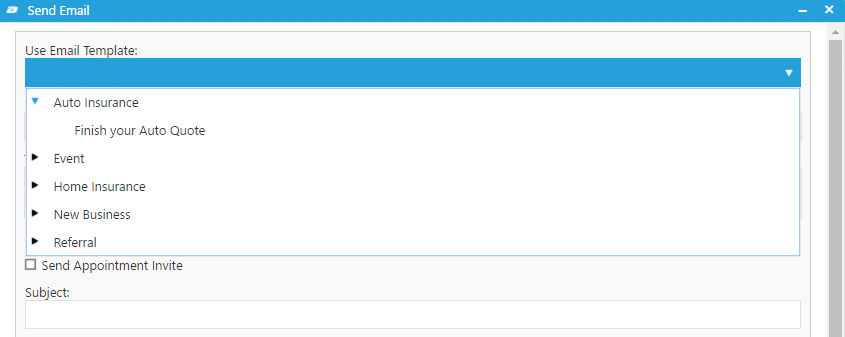
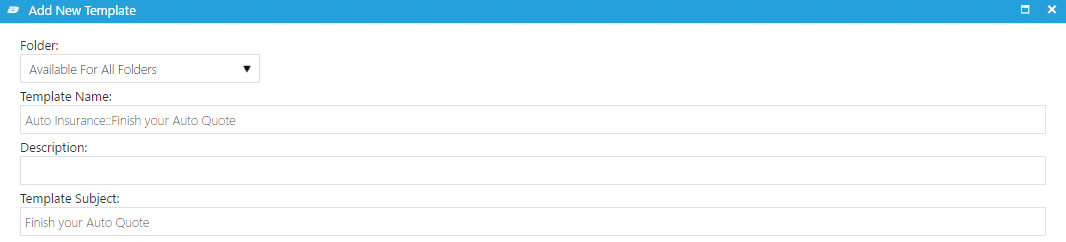
To create a tree, you’ll need to update the name to include the category you’d like to group by. For example, say you’re grouping your email templates based on product/service, and one of the services is “Auto Insurance.” This would be your category. To apply this grouping to your email templates, separate the category and the name of the template like this:
Auto Insurance::Finish your Auto Quote
Any email templates prefixed with “Auto Insurance::” will be grouped together.
If you have an extensive list, treeing can be done on multiple levels. For example:
Auto Insurance::New Leads::Finish your Auto Quote