View the recorded webinar:

Click here to access the recorded webinar
Web Form Designer

Additional options have been added to the Web Form setup, allowing you to now:
- Set a background color for the form
- Set the font size, type, and color
- Choose how the headers are aligned compared to the fields (left, right, on top)
- Choose the width of the form
- Reorder fields displayed on the form
- Make any fields required in order to submit the form
- Create hidden fields – This allows you to hide a field, and default the information that is added to Blitz in that field when the form is submitted
- Display tool tips for fields – this will provide instructions or more information when the user hovers over the field
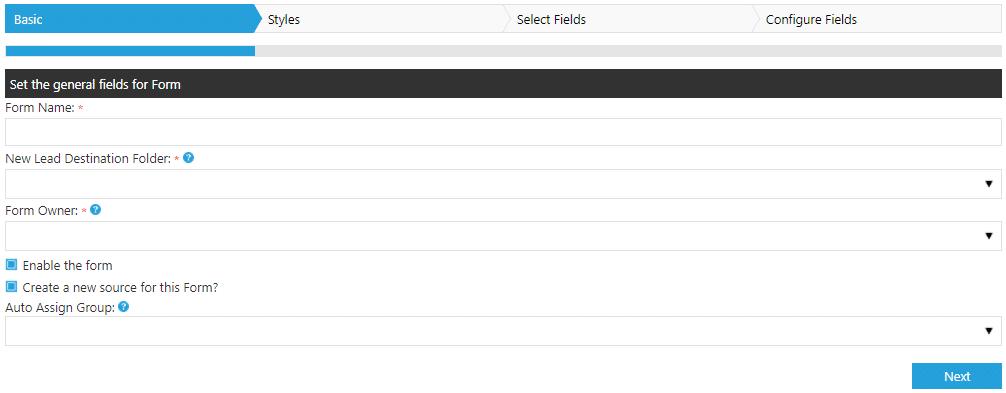
To customize a web form, navigate to Ahrdministration > Web Forms. “Add New Web Form” allows you to create a new web form, or you can click the edit pencil next to an existing web form to make edits. Both options will bring you to the new Web Form setup wizard.
- Basic: This step sets the general internal fields. These options are the same as displayed on the previous web form setup page.

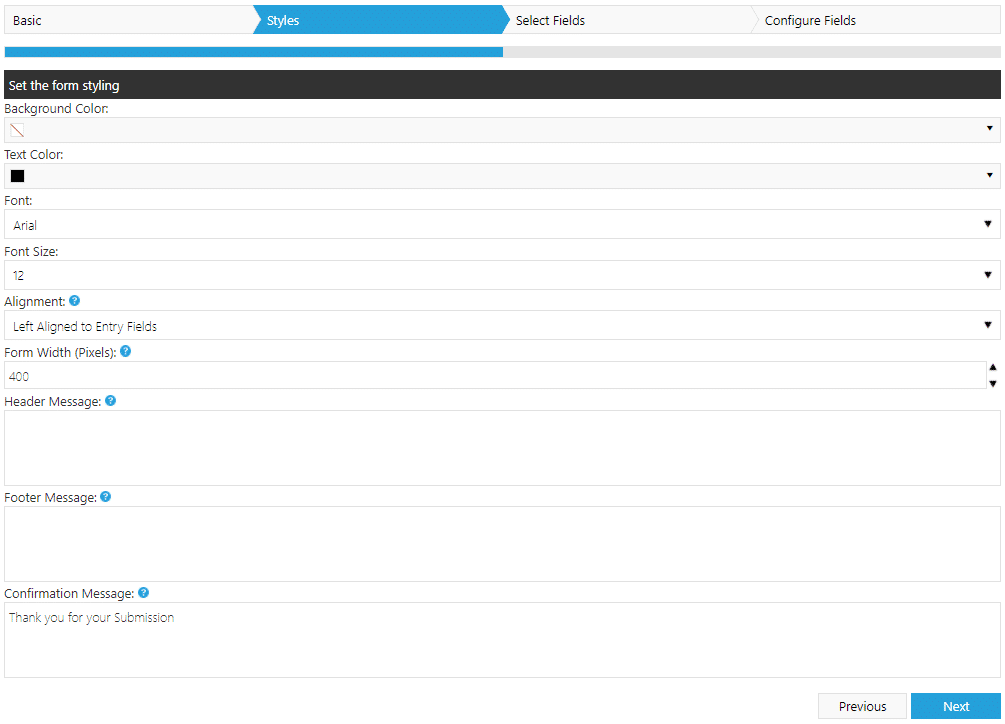
- Styles: The Styles step provides options to:
- Set a background color for the form
- Set the font size, type, and color
- Choose how the headers are aligned compared to the fields:

- Choose the width of the form in pixels
- Set a header and/or footer message. These are displayed above and below the form, respectively.
- Update the Confirmation Message that is displayed when the form is submitted

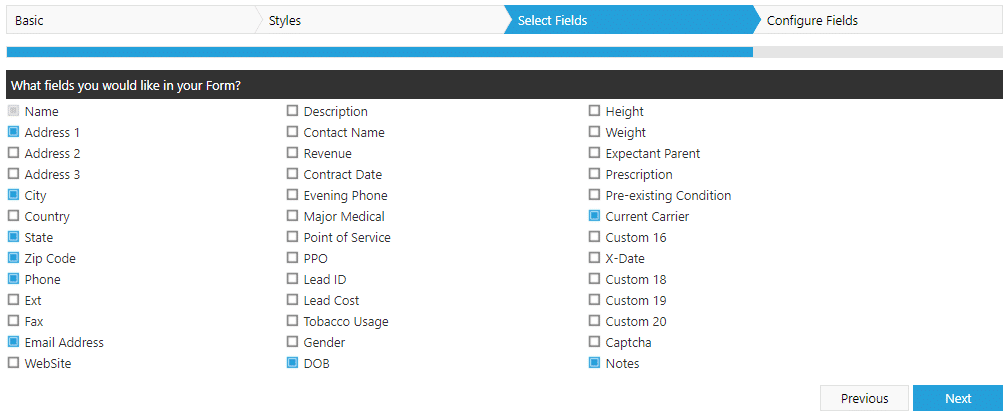
- Select Fields: The fields that are checked on this step are the fields that will show up on the web form.

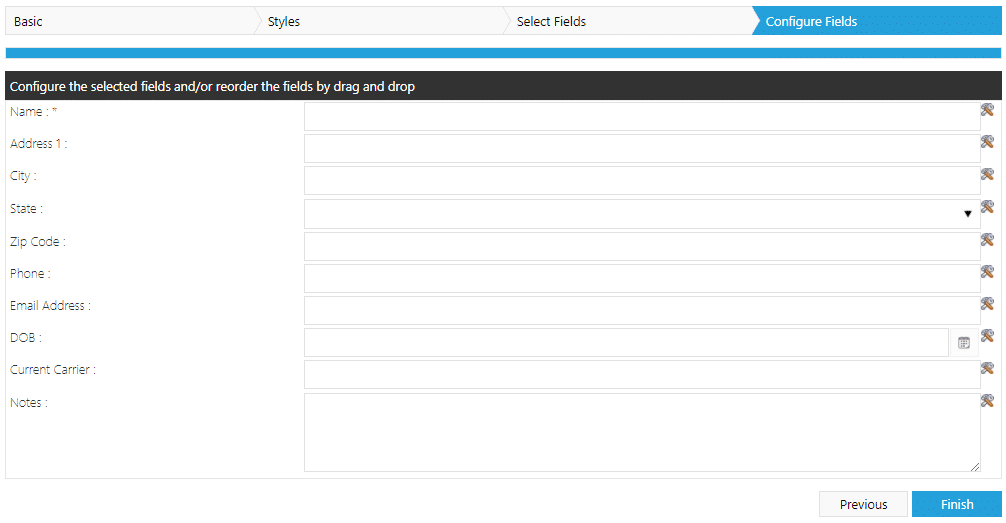
- Configure Fields: This step allows you to reorder the fields by clicking and dragging, and update the field properties.

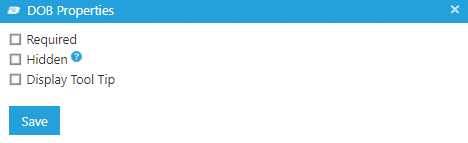
Next to each field is a hammer/wrench icon, providing additional options for the field:
Required: Requires the field to be filled out in order to submit the form
Hidden: Allows you to include a field on your form that is not displayed when it is filled out. This allows you to specify a value for the field with out having to display it on the form.
Display Tool Tip: Provides instructions when the user hovers over the field.

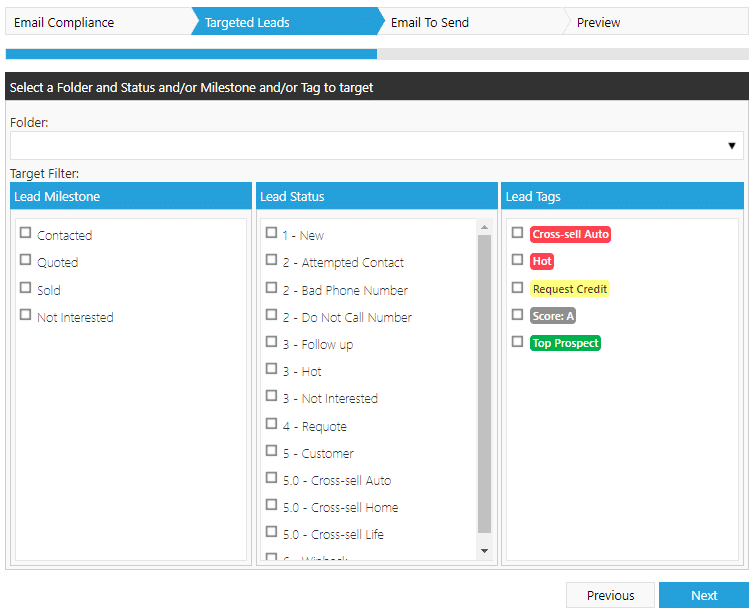
Filter Target Emails by Tag
When sending a Target Email, the filters have been updated to include Tags. This allows administrators to choose only leads that have a specific tag, or group of tags, to receive the target email. This filter can be used in addition to any Milestone or Status filters to narrow down the list of recipients.
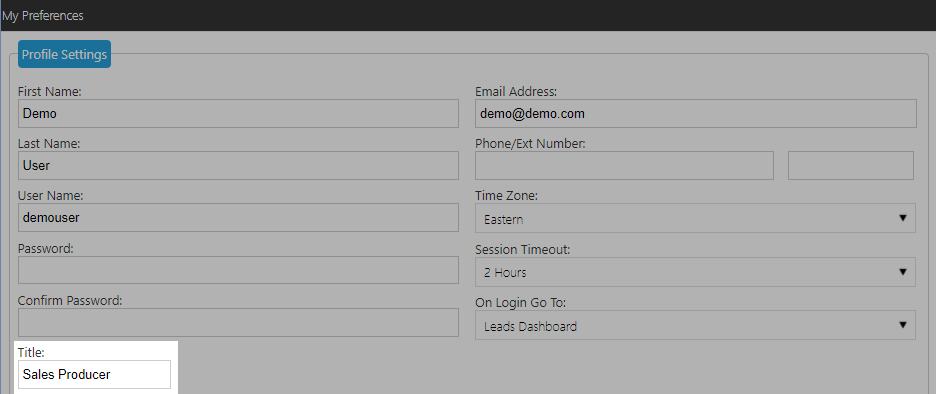
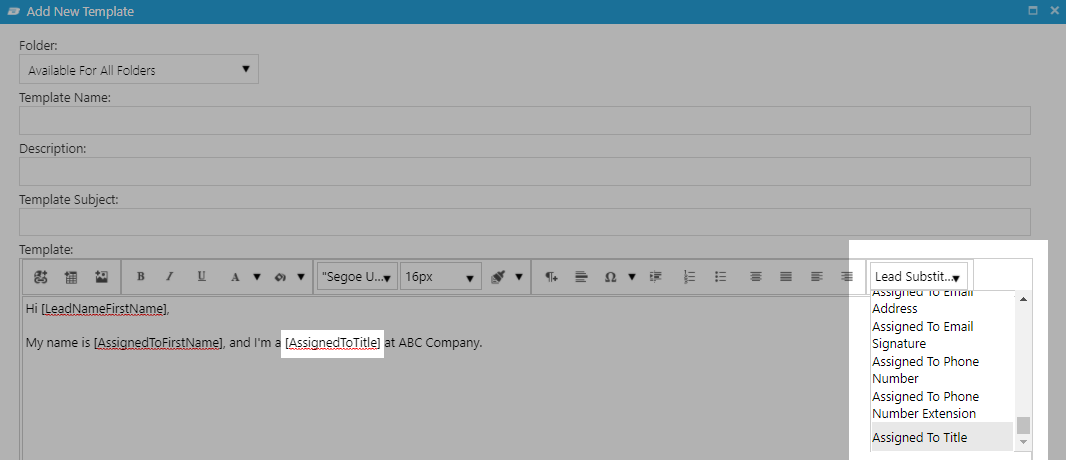
User Title
A new field has been added to users, allowing them to store a title or job description. This information can then be automatically populated into email templates by using substitutions.
To use this feature, first each user needs to add their title to the “Title” field in the “My Preferences” screen.
To insert the title into an email automatically, go to Admin > Email Templates. You can add a new template by clicking “Add New Template,” or edit an existing template by clicking the edit pencil next to the template.
Place your cursor in the body of the email template where you would like this information to be populated, then in the Lead Substitution dropdown, select “Assigned To Title.” This will add a value within the template [AssignedToTitle]. When the email is sent, this value will by replaced by the information in the Title field. If there is no data in the Title field for the assigned user, the value will be removed and replaced with no data.
New Landing Page Option
Administrators have a new option for “On Login Go To”: Overview Dashboard. This opens the Leads Dashboard when admins first log into Blitz, showing statistics for leads and activity across all users.
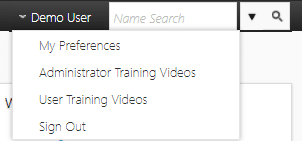
To set this preference, navigate to “My Preferences” under the user menu:
Under “On Login Go To,” select “Overview Dashboard.”
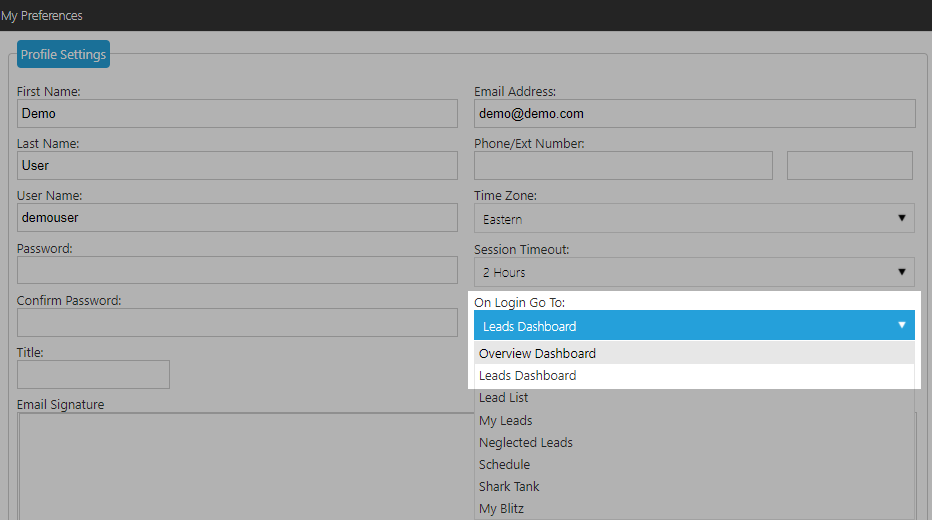
Note: “Leads Dashboard” will take you to a Dashboard on your assigned leads, vs. all leads in the account.