Call Logic Dialer Enhancements
Campaign Statistics
- On the Call Logic Campaign List page, a magnifying glass icon
 has been added next to each dialing campaign that displays call result statistics. To ensure your stats are up to date, click the refresh icon before opening the stats window.
To get to this page, go to Leads > Call Logic. If this page is not available, click here for instructions on configuring Call Logic.

- Click a statistic to open a list of calls, with additional details about each call. For example, if you would like to view all numbers that have been connected, click the number below “Connected.”
- If a recording is associated with the call, there will be an option to download the call recording.

 has been added next to each dialing campaign that displays call result statistics. To ensure your stats are up to date, click the refresh icon
  before opening the stats window.
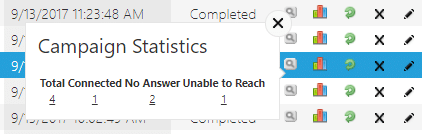

Campaign Activity Report
- On the Call Logic Campaign List page, a graph icon has been added next to each dialing campaign that opens a Campaign Activity Report.
To get to this page, go to Leads > Call Logic. If this page is not available, click here for instructions on configuring Call Logic. - The top of the report contains 3 graphs: a breakdown of call time, total and average talk time within the call time, and a breakdown of call results (connected, scrubbed, or other i.e. no answer, busy, etc.).
- The bottom section of the report displays statistics for each separate dialing session within the campaign. You’re able to restart the session as many times as necessary until there are no more numbers to be dialed.
- By clicking a number in the “Calls Made” column, you can open a list of all dialed numbers with additional details about each call.

 has been added next to each dialing campaign that opens a Campaign Activity Report.
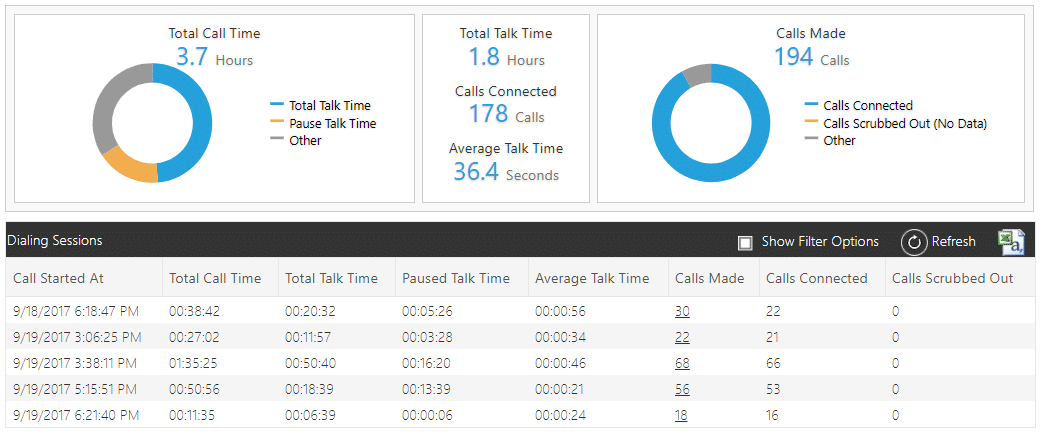
Workflow Enhancements
Color change to Workflow generated appointments
- The color of Workflow generated appointments now correspond to the type of appointment (phone call, task, etc.). This makes it easier for users to visually identify the type or purpose of the appointment.
- The visual indicator for a Workflow appointment has changed from being purple to having a Workflow icon . Icons have also been added to manually created appointments .

- Additional filters have been added to the schedule to hide or show Workflow and manually created appointments.

 . Icons have also been added to manually created appointments
  .
.
Email Templates viewable from Workflow page
- In Administration > Workflows, a magnifying glass icon has been added next to each automatic email that will be sent. Clicking the icon will show the contents of the email template.

 has been added next to each automatic email that will be sent. Clicking the icon will show the contents of the email template.
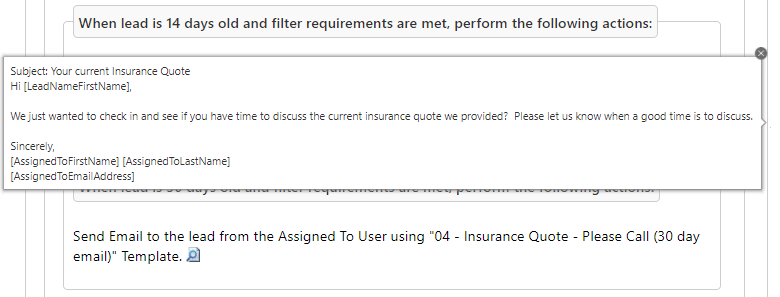
Workflow actions allowed for a specific user (vs. the assigned user)
- Emails can be sent on behalf of a specific user.
- Appointments can be generated for a specific user.
To make changes to your Workflows, submit a support ticket
Addition to history note for Workflow generated appointments
- History note now contains the appointment description.


Email Enhancements
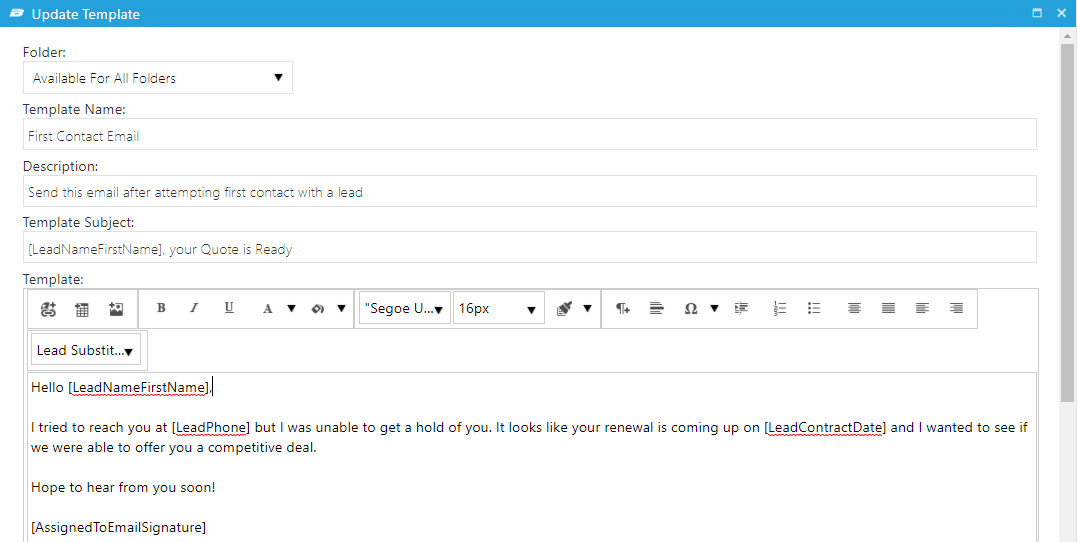
Allow substitutions on subject line of emails
- Substitutions add specific lead data to an outgoing email. To add a substitution to the body of an email, place your cursor where you would like the data to appear in the template, and select the data from the dropdown. When the email goes out, this value will be replaced with the corresponding lead data.
Click here for full instructions - With this enhancement, substitutions can now be added to the subject line. To add a substitution to the subject line, first add it to the body of the email, then copy and paste the substitution to the subject line where you would like it to appear.

Additional email deliverability tracking for individual leads
- Icons have been added on email history notes to indicate whether the email has been opened , and if any links within the email have been clicked . Click either icon to show date and time stamp.

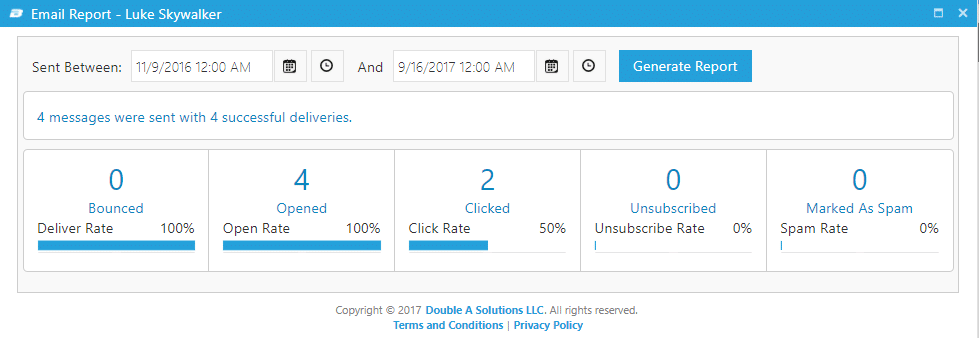
- The Email Deliverability report is now available for individual leads. To view the report, click “View Email Report” within the Engagement section of the Lead Log.

Click on a stat to open up a detailed list of emails.

 , and if any links within the email have been clicked
  . Click either icon to show date and time stamp.
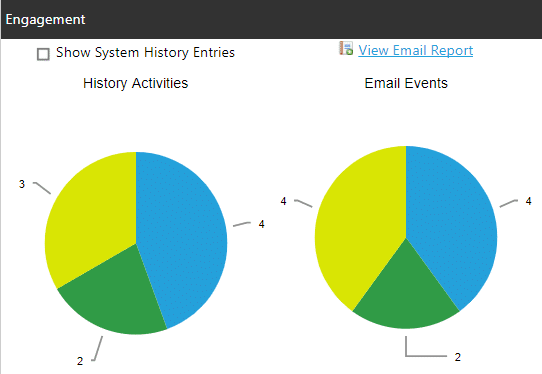
Email deliverability report enhancements
- Two filters have been added to the Email Deliverability report:

- Subject filter – To filter for all emails that have a specific subject, click the magnifying glass next to the subject.
- Email type filter – To hide or show emails that are a specific type, use the check boxes above the list.

- Subject filter – To filter for all emails that have a specific subject, click the magnifying glass
- URL is now listed in the Clicks details. Click the icon to view the URL(s) clicked.


 next to the subject.
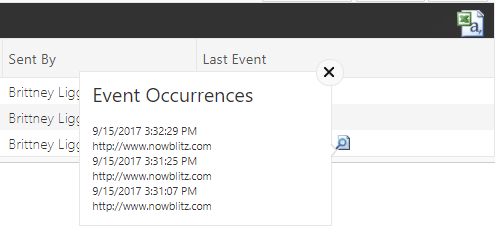
Lead List Enhancements
The “select all” option can now be applied to all leads in the list
- The checkboxes next to leads on a list are used to apply specific actions to the selected leads. An enhancement has been added allowing you to select all leads on the list, as opposed to the displayed leads on your current page. When the top check box is clicked to select all on the page, a yellow message will appear above the list giving an option to select all leads in the list. Once all leads are selected, you can apply an action to the leads using the “Select Action” dropdown on the top left of the list.
- This option is available for administrators only


Additional actions have been added for selected leads on a lead list
- Update Lead Source
- Mass unassign leads
Last Action Type has been added as a column option
- This field corresponds to the “Last History Date” by displaying the action that was performed on that date.
- To view this column, click “Column Options” on the black bar above the list you’re viewing.


Web Lead Configuration Settings Updates
Indicator for existing configurations
- Each web lead provider that is currently configured will be listed next to the provider’s name.
- The provider’s website link has been moved to the left of the provider’s name, as an icon .

 .
.
Confirmation Email update
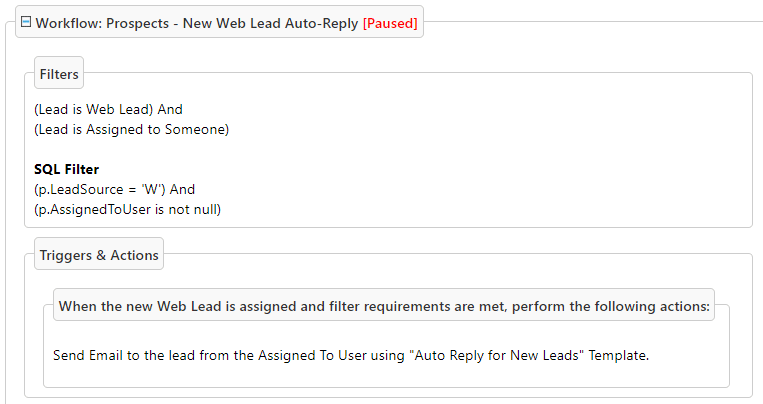
- Workflow is now used to send out confirmation emails, so this option has been removed from the Web Lead Configuration page.
- Example of a Workflow used to send an auto-reply confirmation email for new leads:

To make changes to your Workflows, submit a support ticket
Web Form Configuration Settings Update
Update a folder’s custom fields from the Web Form setup page
- An icon has been added to the Web Form setup page, next to the Folder name, that opens the configured Folder’s custom field settings.
- The custom field names populate automatically on each Web Form settings page. To open this page, click the edit pencil next to the form.
 has been added to the Web Form setup page, next to the Folder name, that opens the configured Folder’s custom field settings.
 next to the form.