Blitz For Sales Follow-Up is excited to announce the official launch of the new Blitz user interface. This is a complete refresh, making it more user friendly and eye catching. Below is a breakdown of each new feature, as well as highlights on updates to existing features.
Click here for the full video walkthrough
Renamed features:
- Campaigns are now called Folders
- Simple name change to better fit what this feature truly is.
- Campaign Lead History is now Group History
- Simple name change to better explain the feature.
- Campaign Email is now Target Email
- Along with a name change, Blitz transformed the bulk email feature to become easier to use and more focused on targeting specific groups of leads.
- Lead Distribution is now Bulk Assignment
- New name that better explains what this features is for.
- My Company is now Account Settings
- New name that better explains what this features is for.
- My Profile is now My Preferences
- This offers the same features as the previous version just in a more convenient location in the top right of your screen.
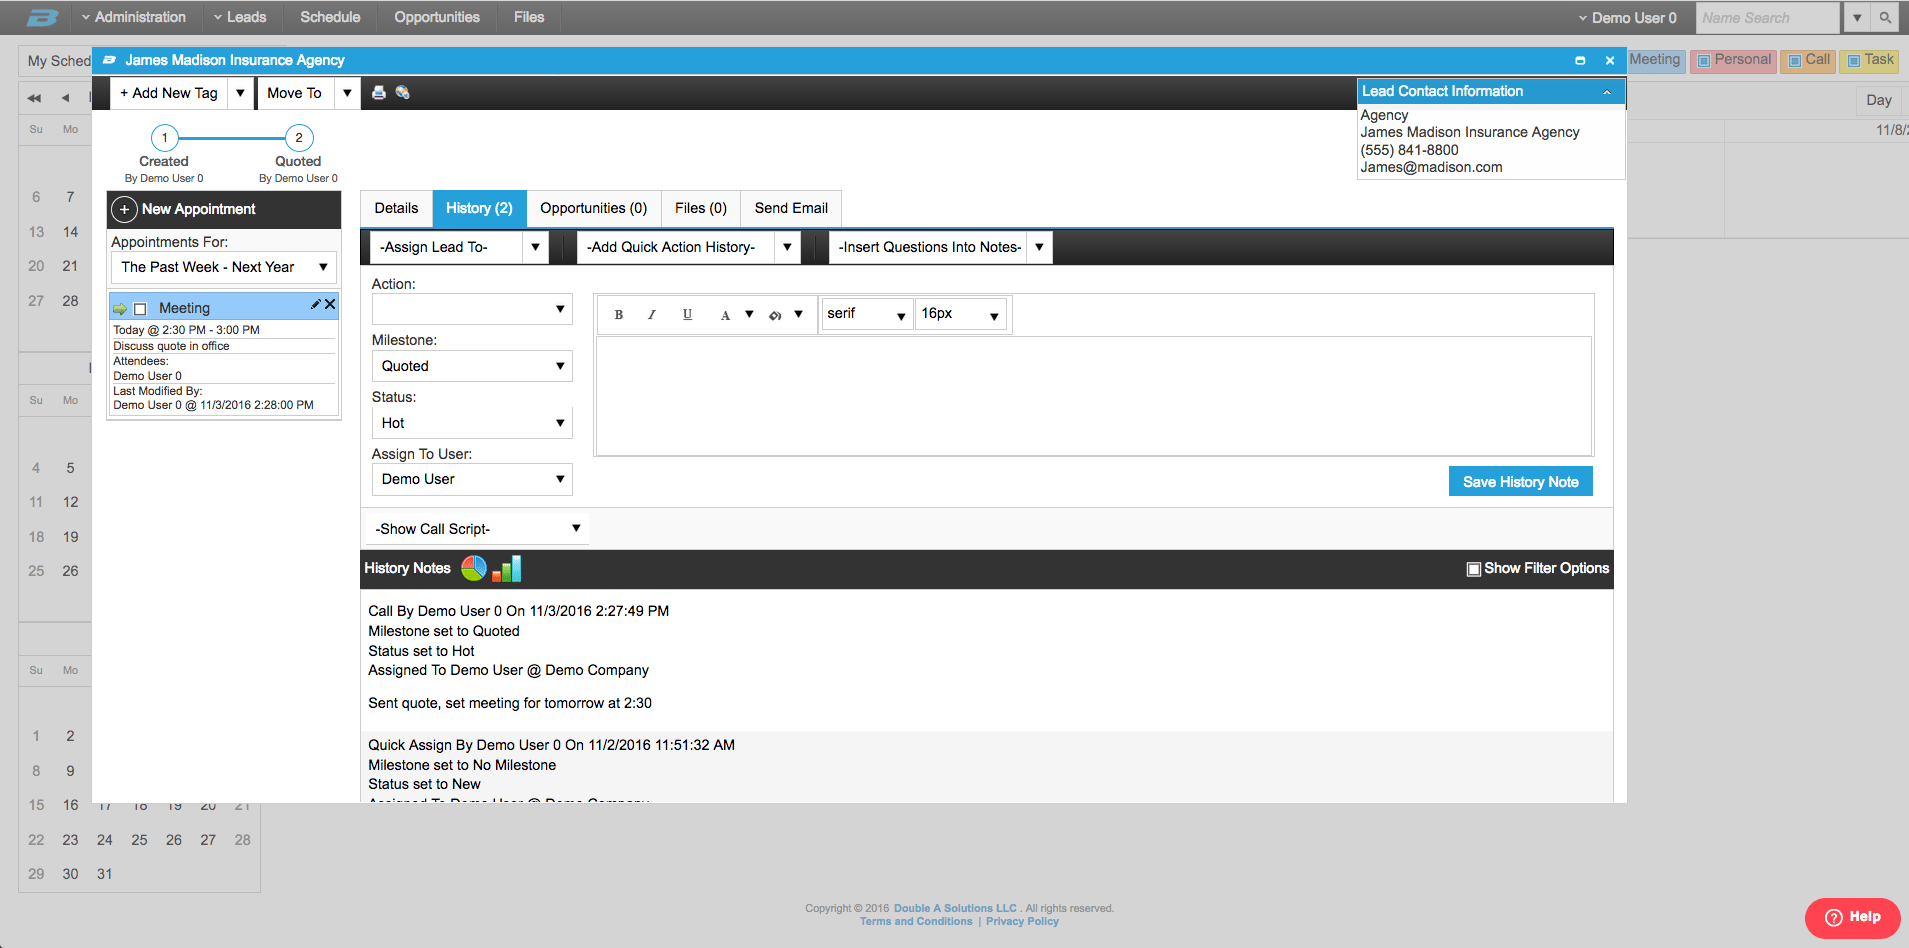
Contact History (formally Lead Log)
This is the hub that contains all information on a lead. We have revamped the screen to better serve the user and improve productivity.
- The schedule tab has been removed, and is now available on the left sidebar within every tab in the contact history (lead log) screen. This allows users to view and edit appointments from anywhere while the lead is open.
- The engagement tab has been removed, and moved to the history tab. This saves time, and gives users more visibility on overall engagement while viewing and adding history notes.
- The directions tab has been removed, and you can now click an earth icon at the top of the screen to view directions.
- You can now attach files directly to emails that are saved in your Blitz account. Now more downloading first!
Click here for more information on this feature.
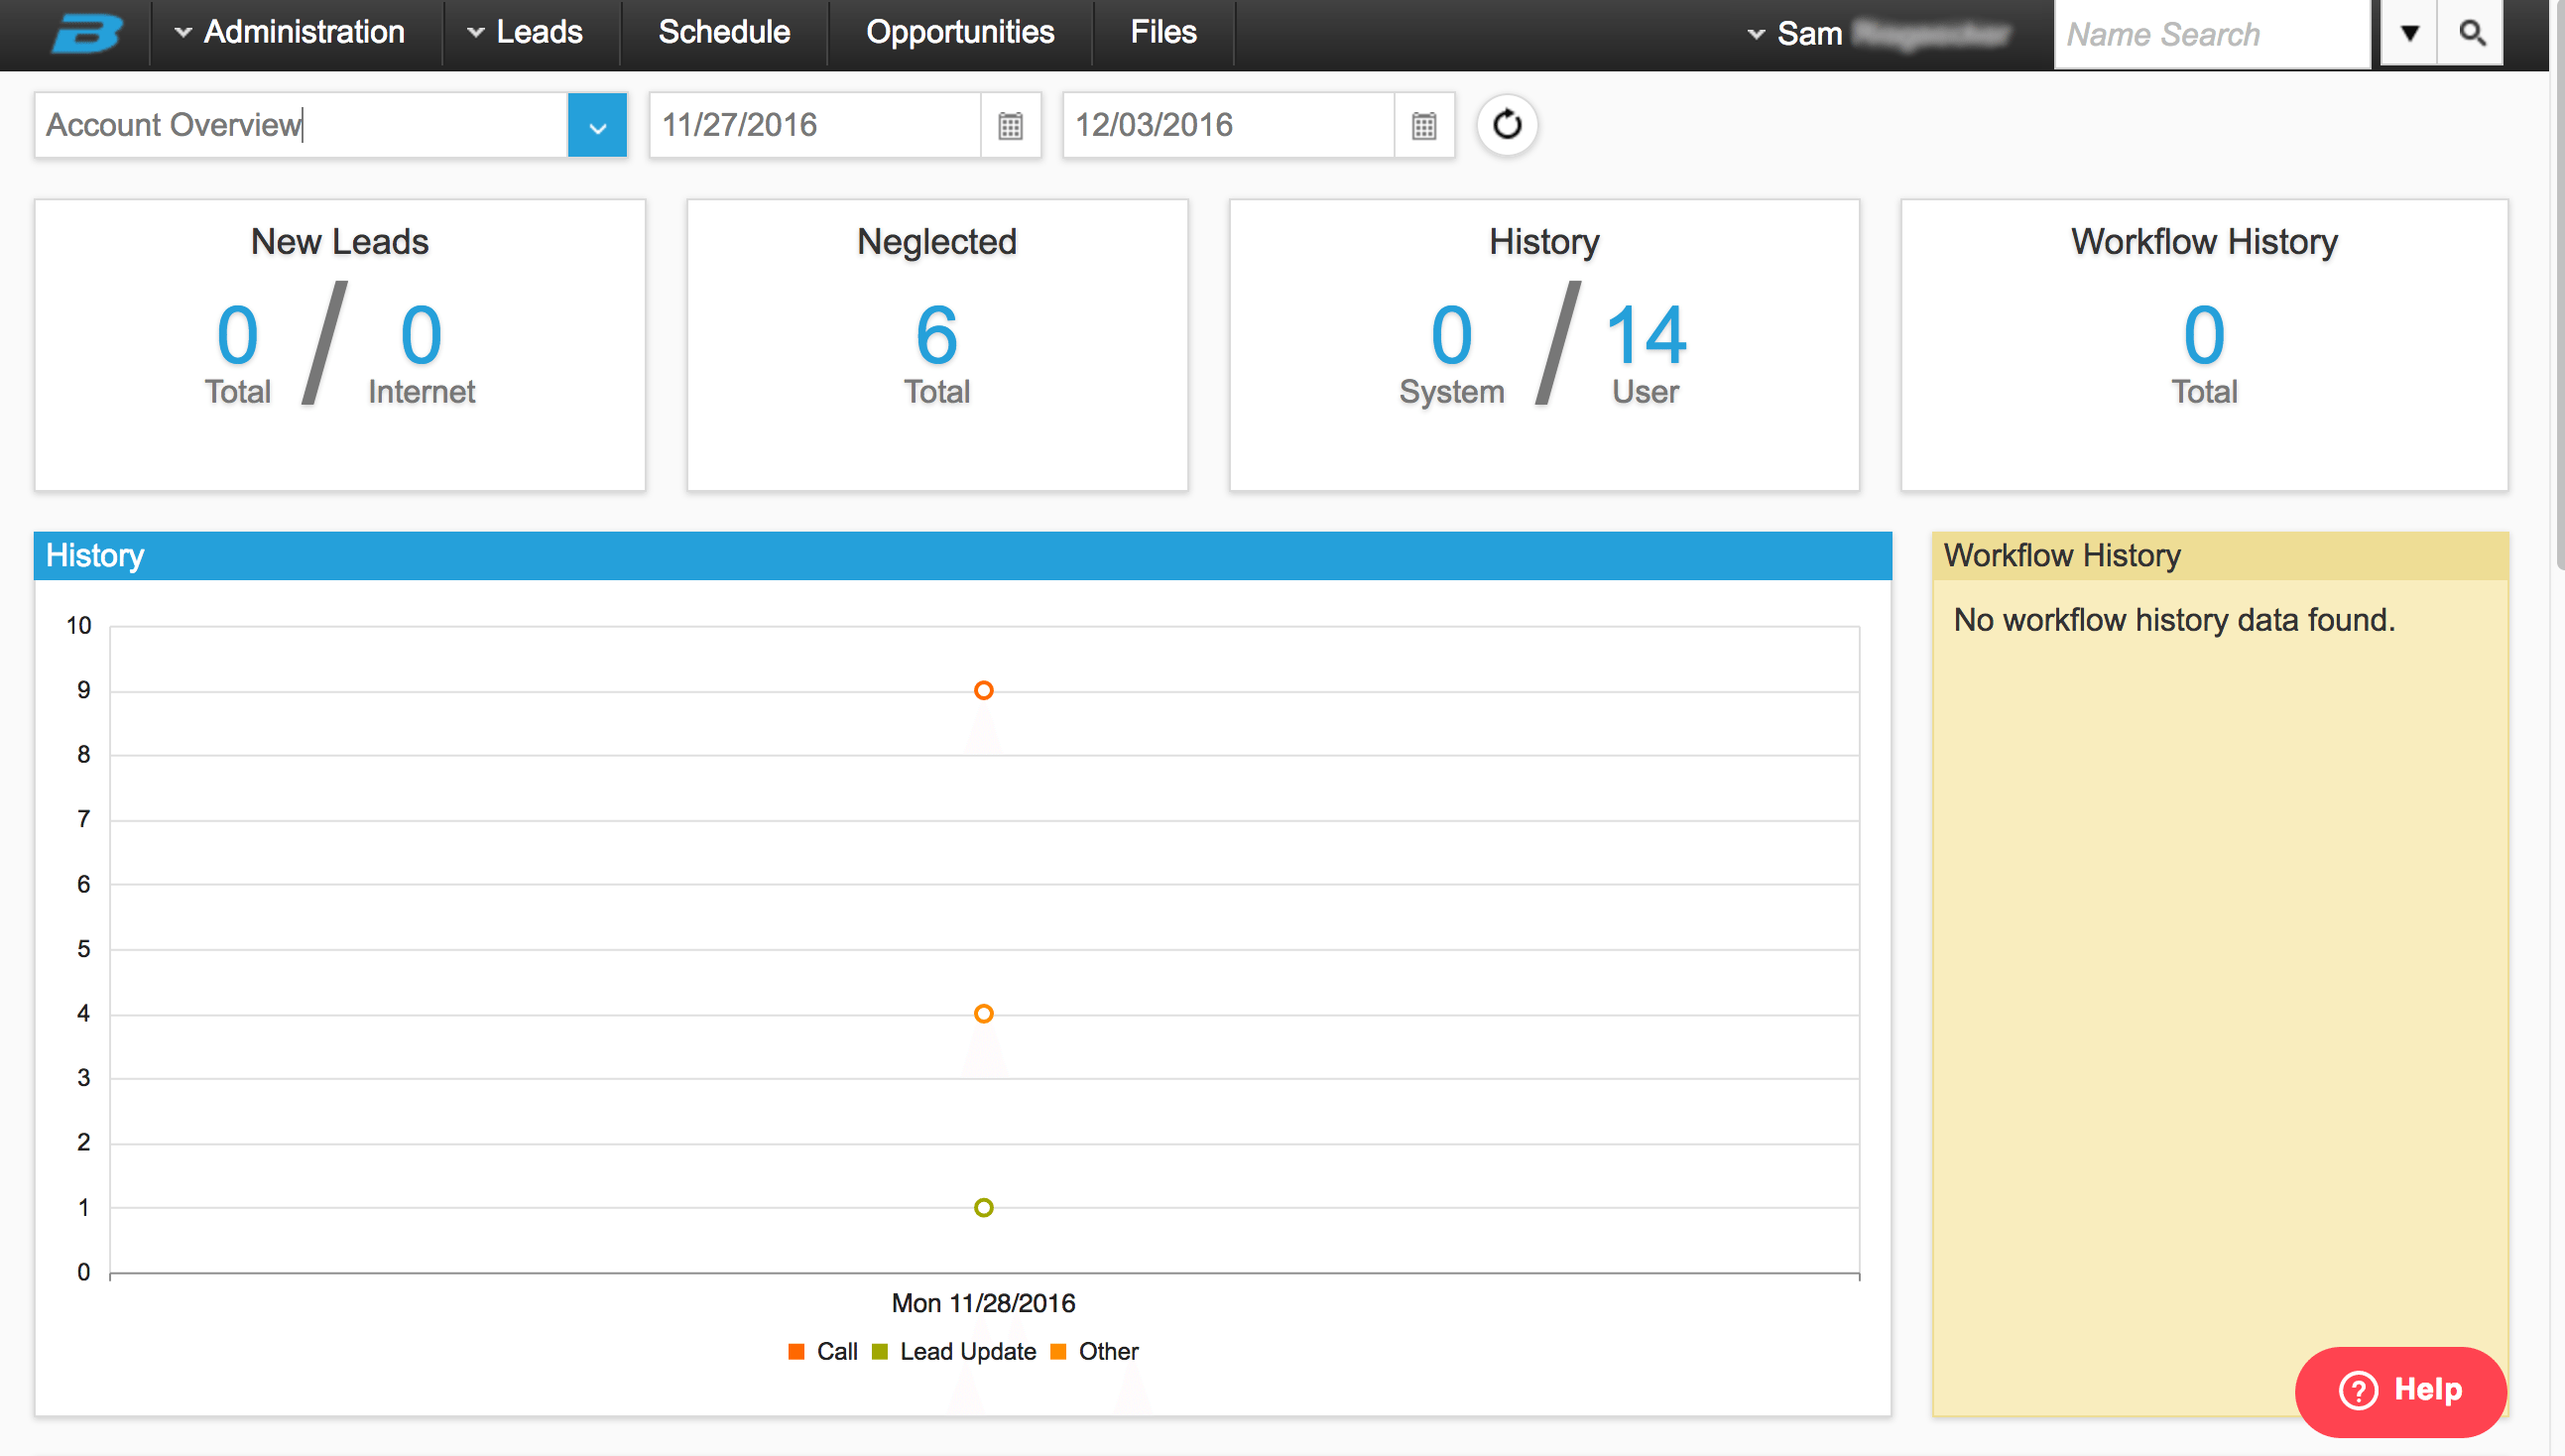
Dashboards
The dashboard is a brand new feature. From the amount of recent leads, to neglected leads and even the history of the lead as seen below, this feature will help make your business more successful with your leads. Better visuals and engagement features allow you to better understand the system. Both the Admin and User accounts will see that this feature will help their book of business expand!
Click here for more information on this feature.
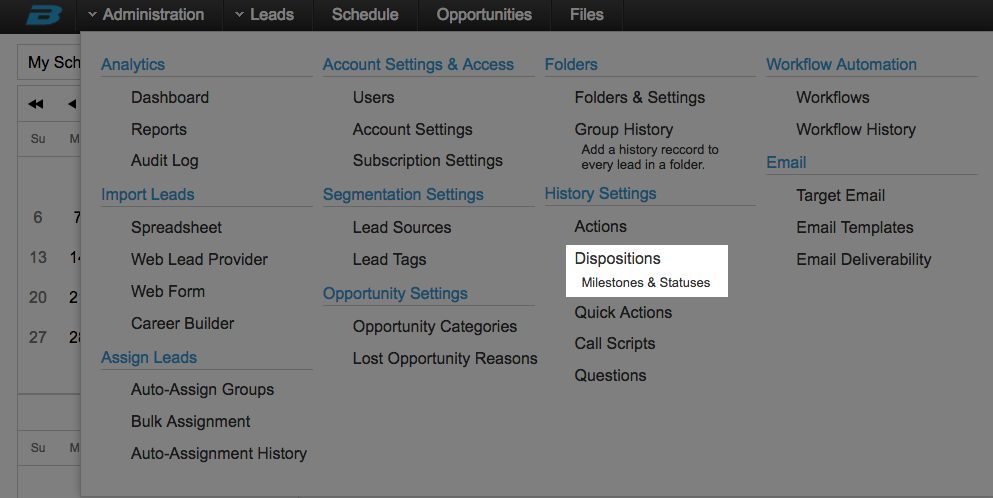
Dispositions
Dispositions, the combination of a Milestone and Status, are now able to be linked. This allows only certain Statuses to be used depending on the current Milestone. Linking Milestones and Statuses prevents users from choosing an invalid combination (i.e. “Sold” and “New), helping to keep your database clean. Settings for Dispositions can be found under Administration > Dispositions (under History Settings).
Click here for more information on this feature.
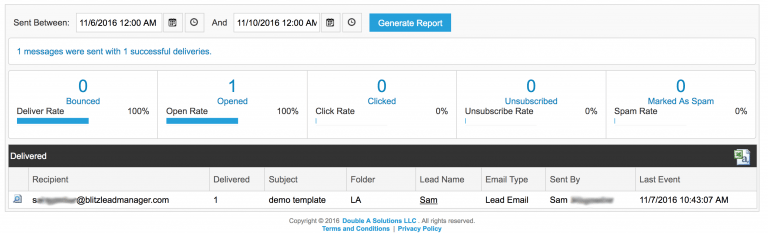
Email Deliverability
Blitz’s new Email Deliverability report allows you track the deliverability and recipient actions of emails sent from Blitz. The report provides you with a way to measure your emailing success, and gives you the ability to follow up with contacts at the ideal time – while they are engaging in your emails. If you notice that leads are not clicking the link provided in emails, or that many of your emails are being marked as SPAM, it may be time to revamp the content of your emails.
Click here for more information on this feature.
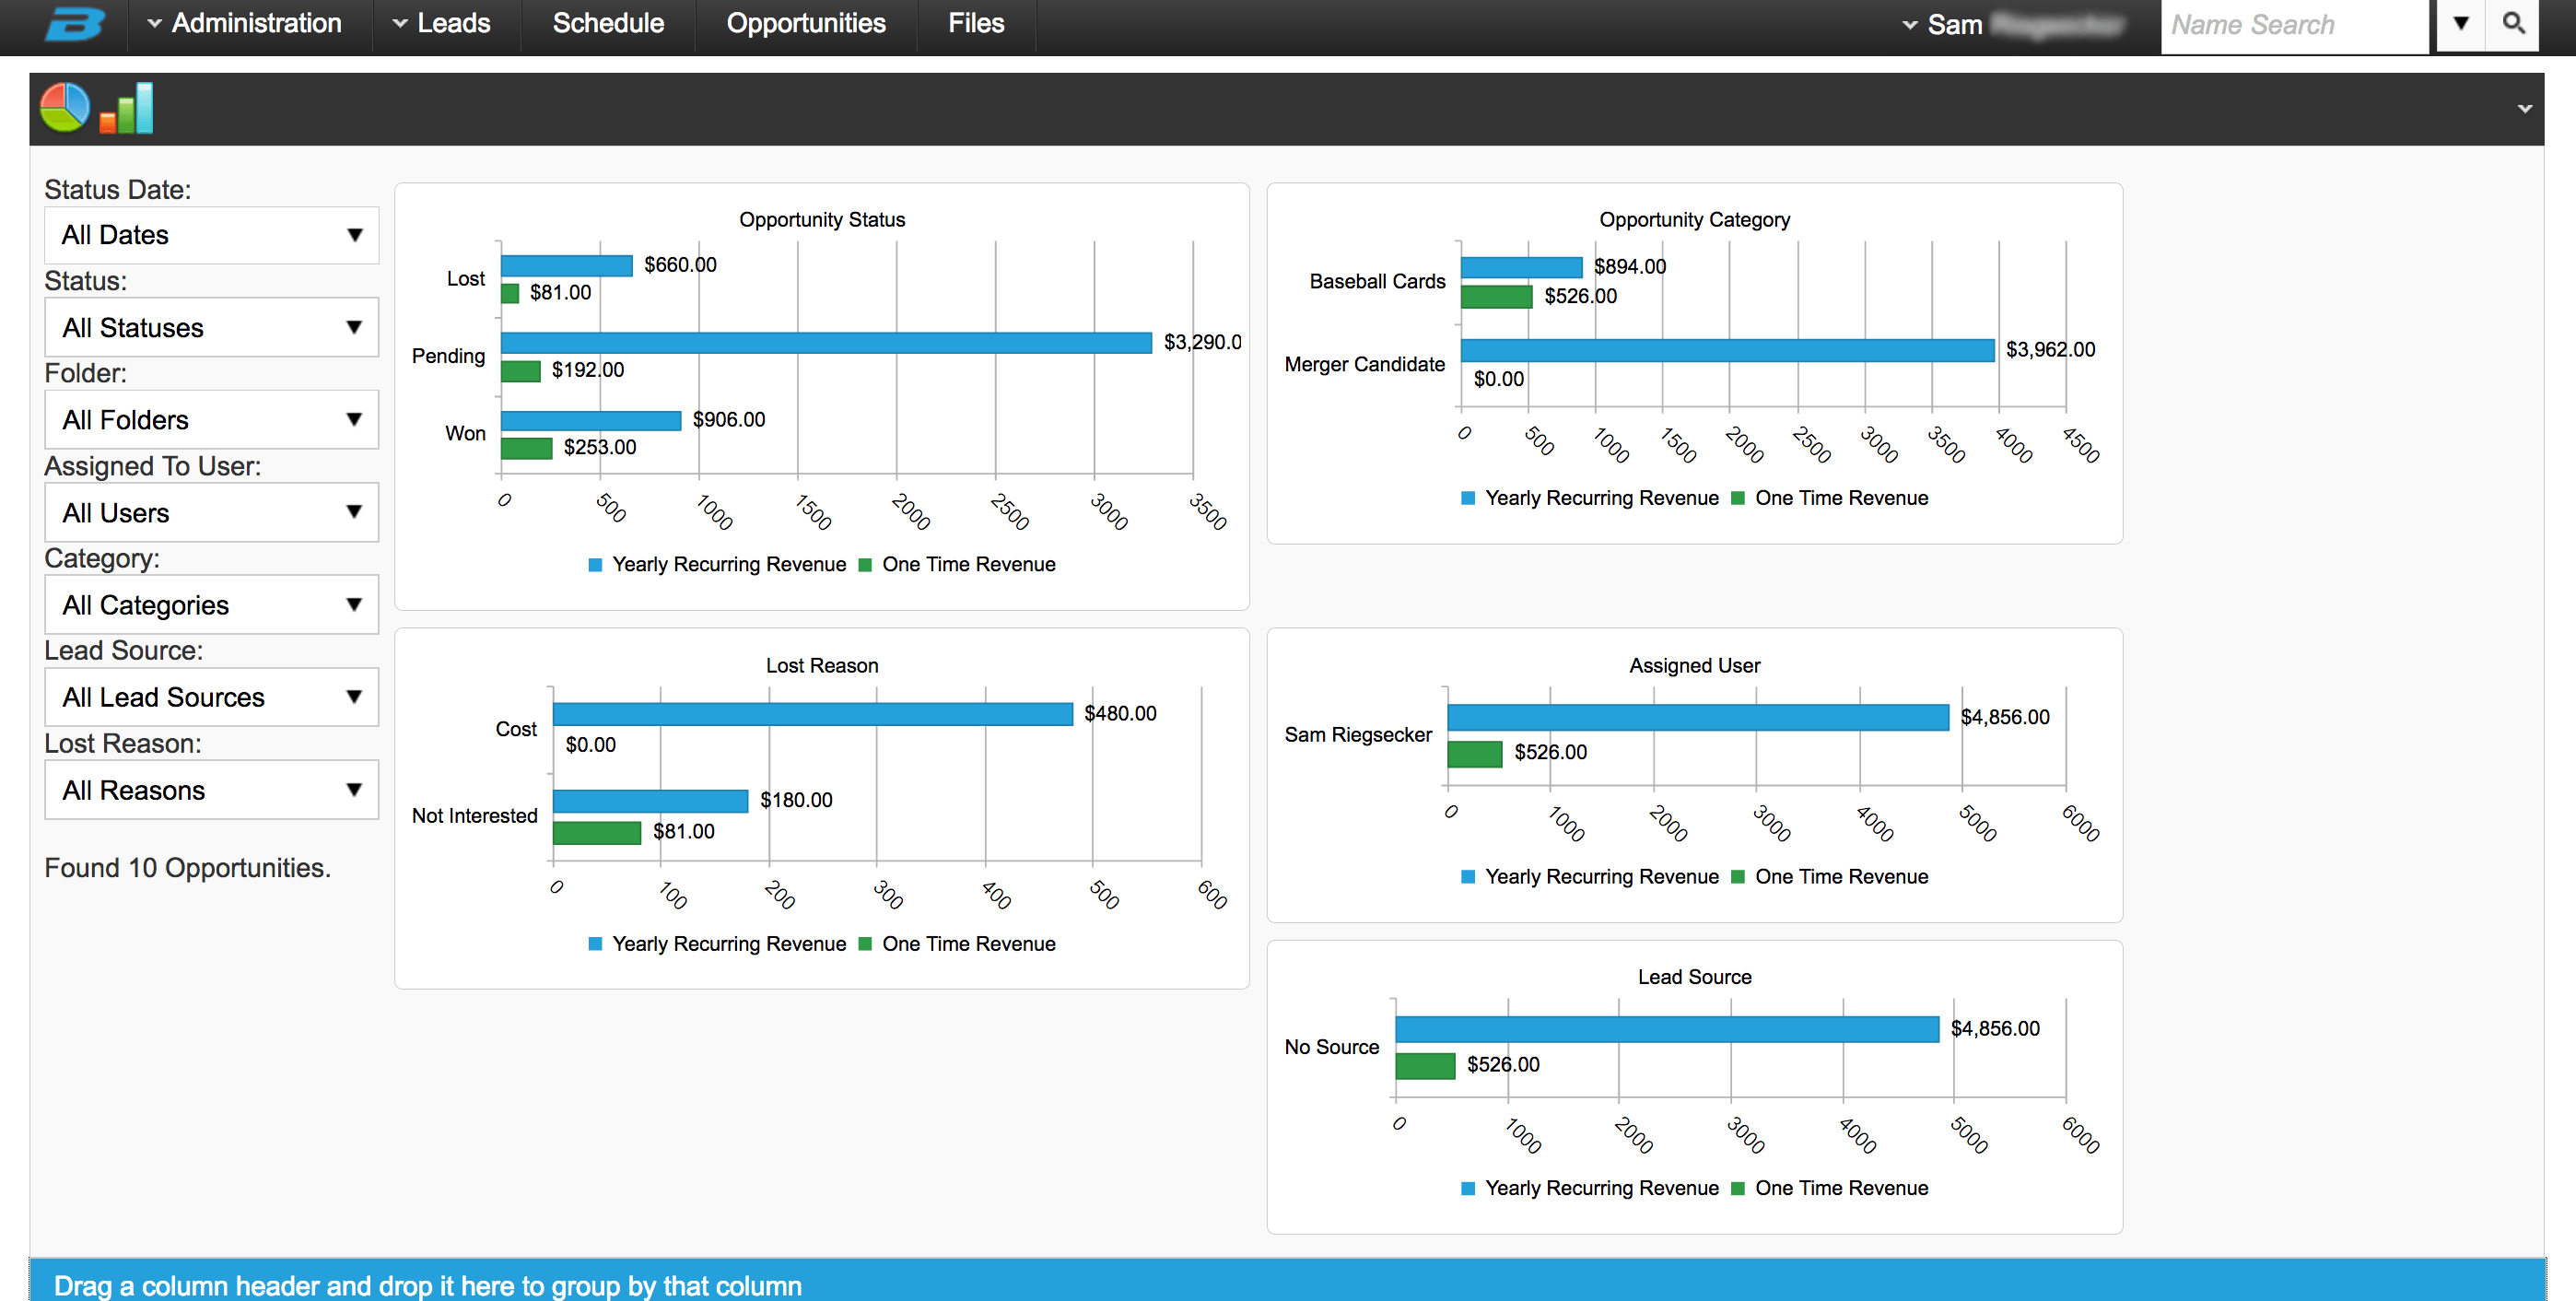
Opportunities
Opportunities are used to track quotes and proposals by dollar value, in order to track ROI, projections, sales goals, and more. This feature has been relocated from the leads menu, to now having it’s own menu. In addition to the new menu option, graphs have been added to the top of the screen that measure:
- Total value of pending, won, and lost Opportunities
- Total value of won Opportunities compared by Category (Policy type, product, or service)
- Total value of lost Opportunities compared by Lost Reasons
- Total value of won Opportunities compared by assigned user
- Total value of won Opportunities compared by source

To view the graphs, click the graph icon on the top of the page:
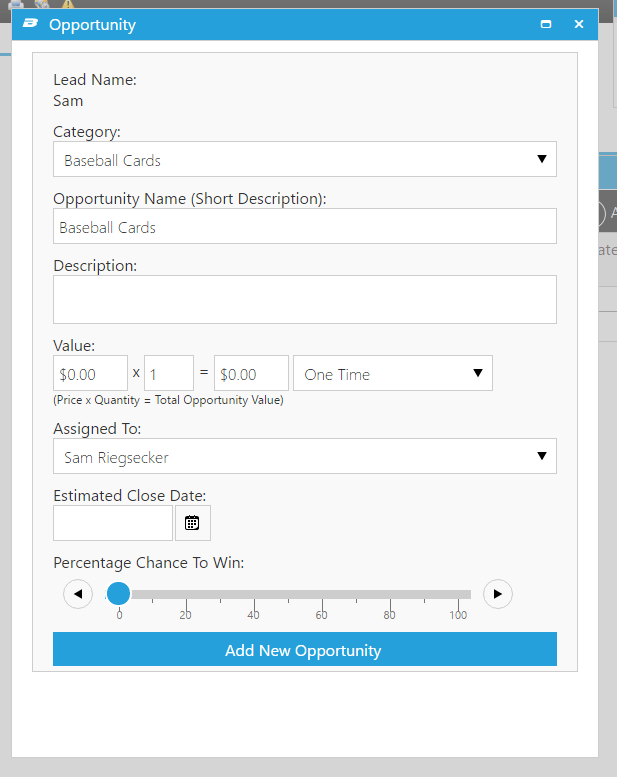
Creating Opportunities
To create an Opportunity, click the Opportunities tab in the contact history screen for a lead, then click +Add New Record. A couple changes have been made:
- The category drop down is now at the top.
- When a category is selected, the required Opportunity Name field is auto-filled. This saves time having to type a name each time a new Opportunity is added. After it’s auto-filled, you also have the option to update the name to something else.
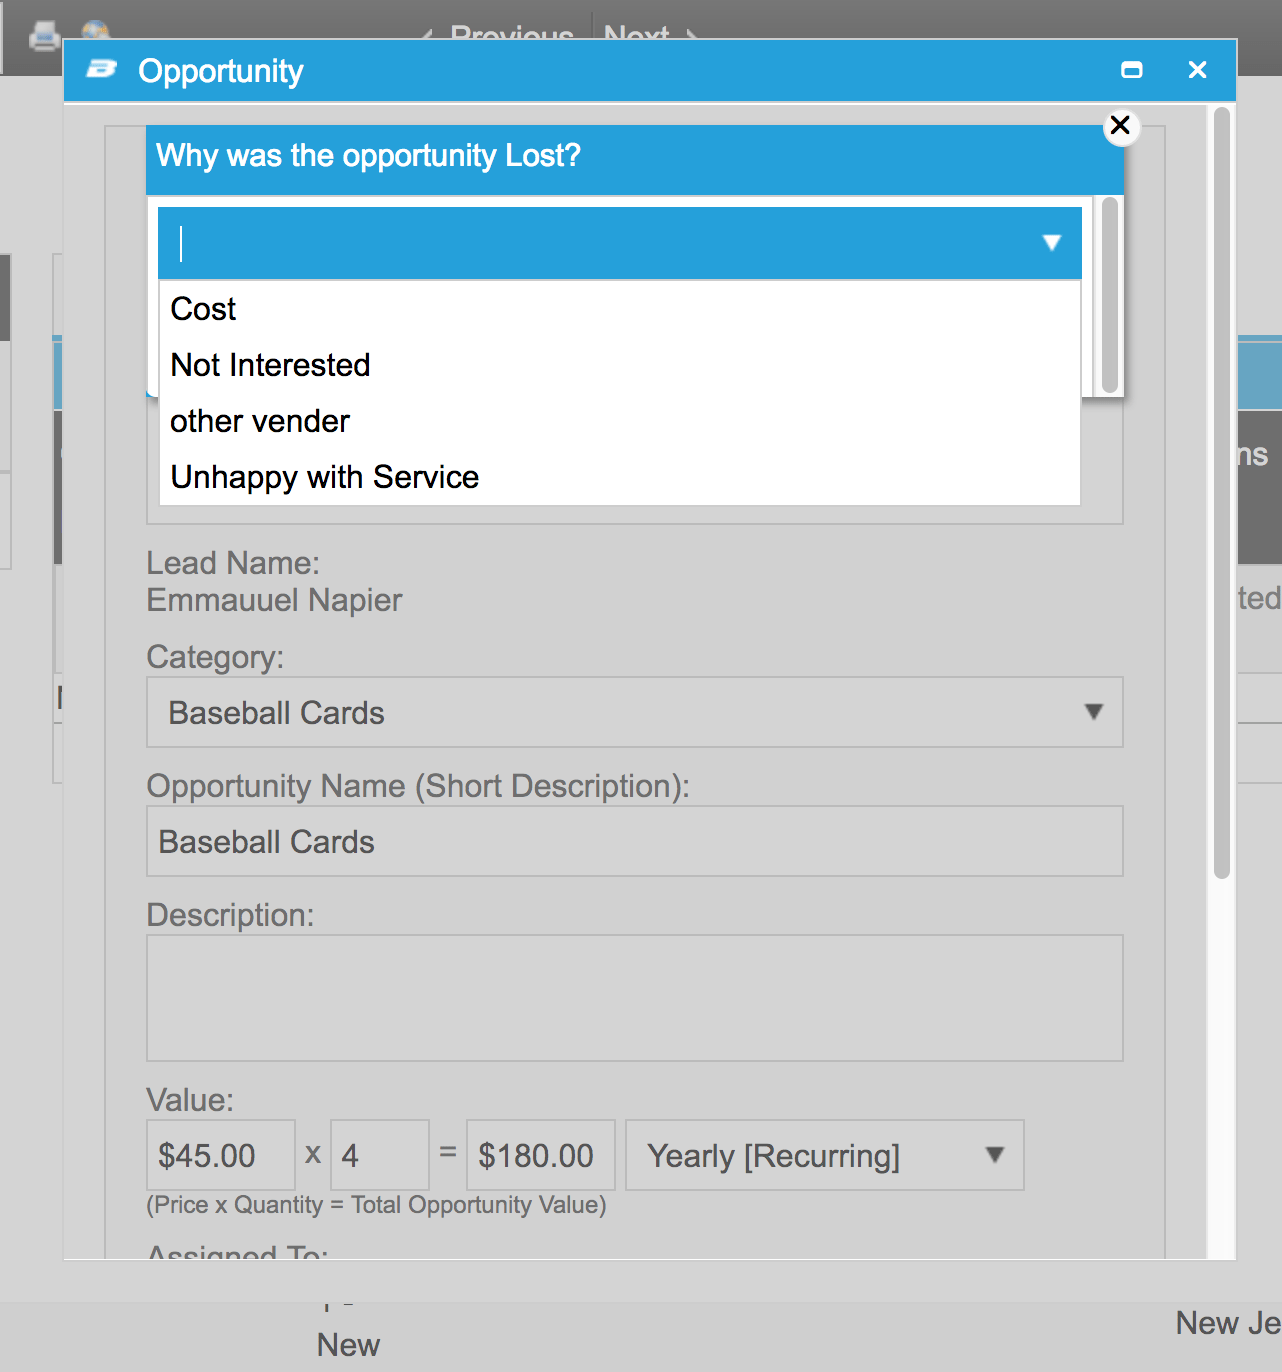
Once the opportunity is created you have the ability to choose between lost, won, or pending. If the lead is marked lost, a secondary drop down shows up as seen below. You have the ability to mark why the lead is lost. Reasons can be customized in Administration > Lost Opportunity Reasons.
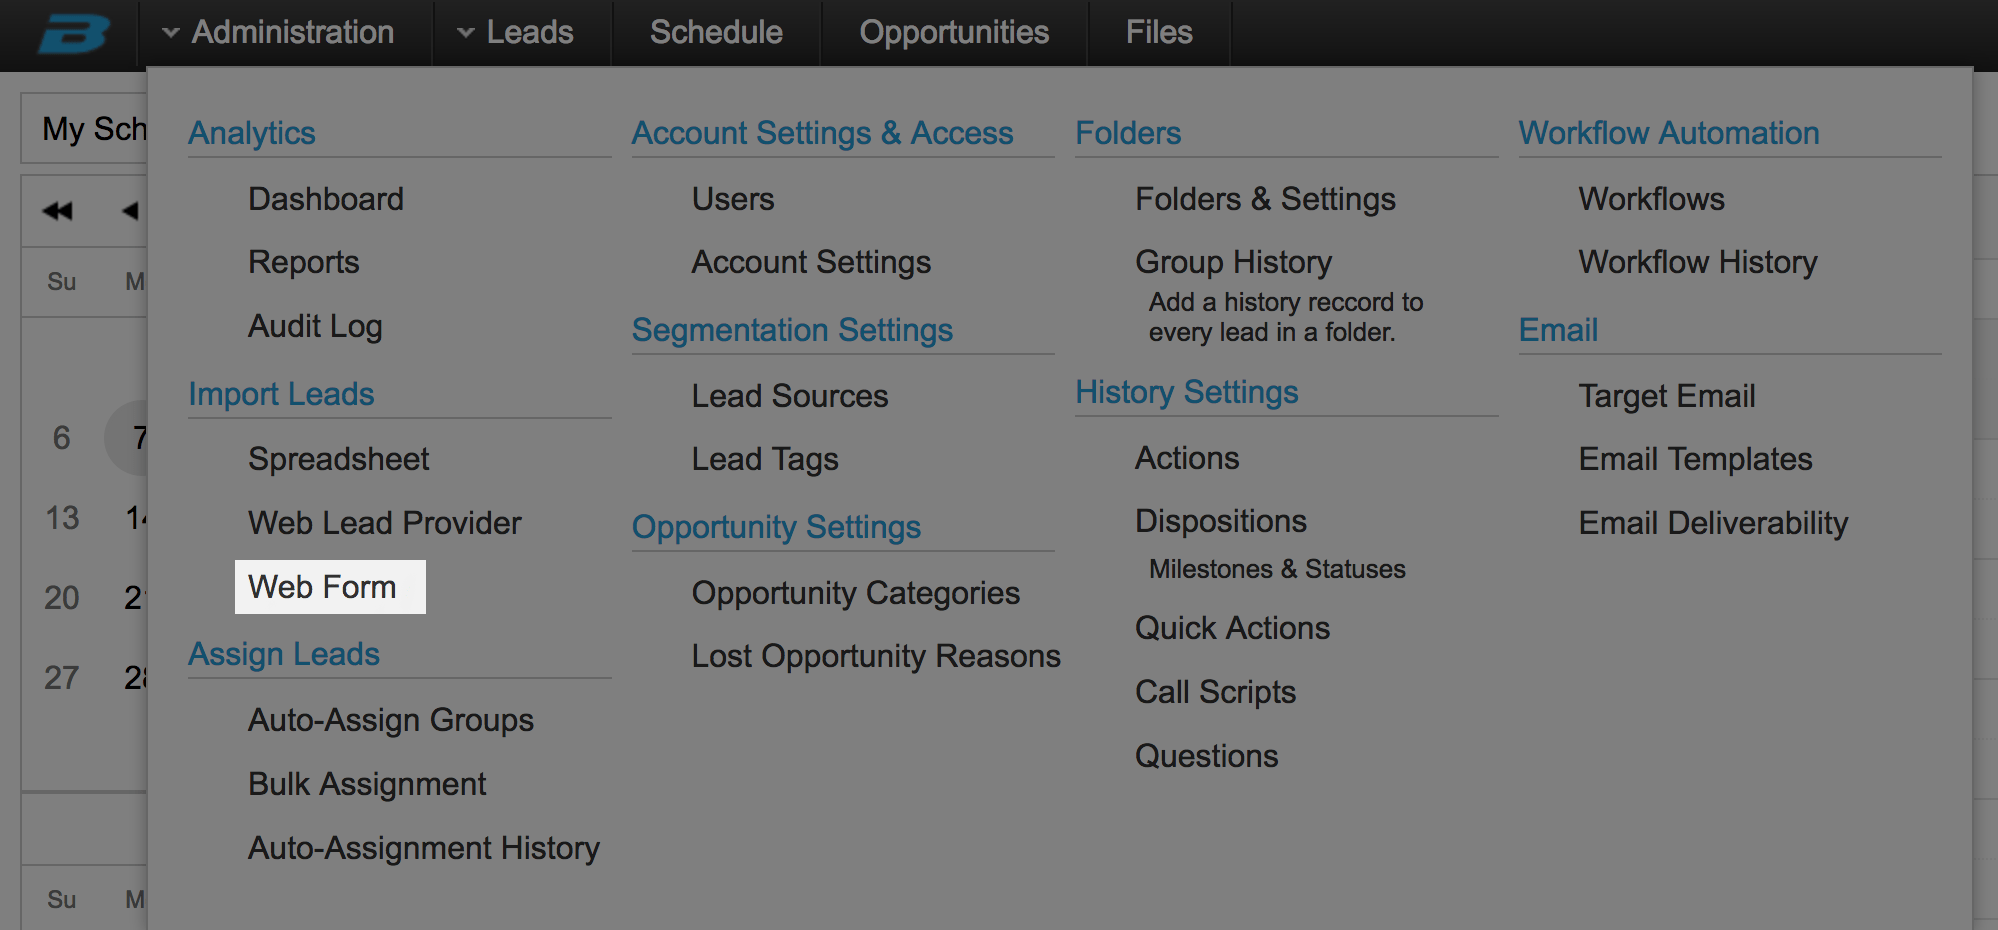
Administration Menu
The administration menu has been reorganized to make navigation simpler. As previously mentioned, some of the features have been renamed to better explain their functionality. We also have listened to our users and better segmented the features in this tab to help ease of use and give better explanation of what the feature is related to.

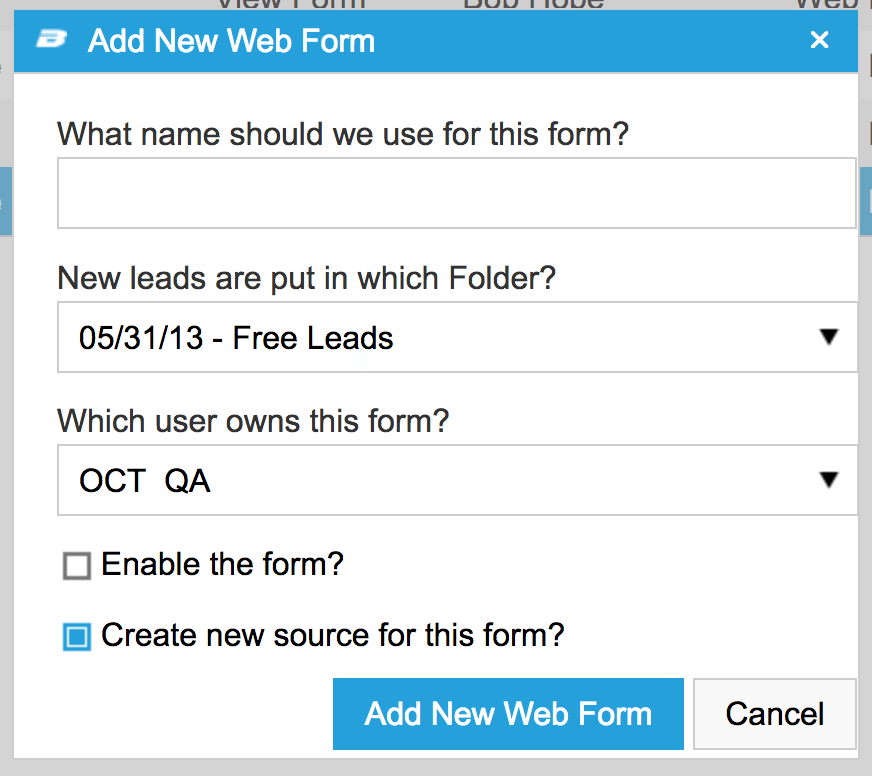
Web Form
Previously, the Web Form was associated with a folder (previously “campaign”), and could be found under the folder’s settings. The Web Form has now been relocated to the Admin Tab, making it easier to access. A web form is used to generate leads by adding a form to your website, referral partner, and/or Facebook page. Once the form is completed, the lead will automatically be added to your Blitz account. The Web Form feature can be found under the import lead tab seen below. We felt this would give the user the opportunity to use this feature to its full potential.
Some features that are included in the updated Web Form feature:
- Can still associate a Web Form to a specific Folder
- Multiple Web Forms can now be associated to one folder
- Reduces the amount of clutter and folders (campaigns) you have in your system
- Can use Sources to know which form the lead came from
- Even easier to create the form
Below is an example of what a Web Form looks like from the users perspective. When a form is submitted, the information is dropped into Blitz automatically.

Click Here for more information on Web Forms.
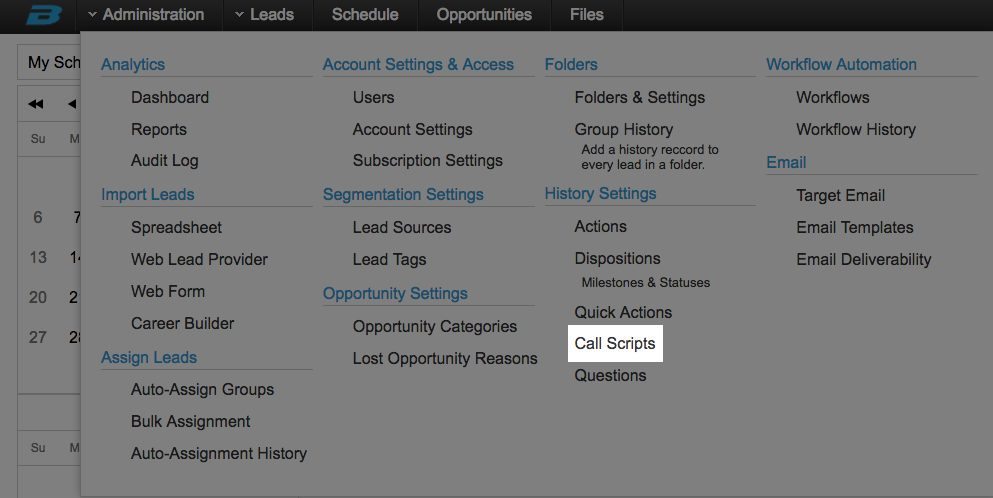
Call Scripts
Previously, each call script was associated with a folder (previously “campaign”), and could be found under the folder’s settings. Call Scripts are now available in the Admin Tab, making them easier to access. Admins can create call scripts to help give the sales associates a better reference on what to say or talk about in a each type of call.
From a user standpoint, call scripts are a great starting point when handling customer interactions. Below is an example of what a call script looks like when viewed as a user during a call. Call scripts are available to the users in the contact history feature to make using the scripts easy.
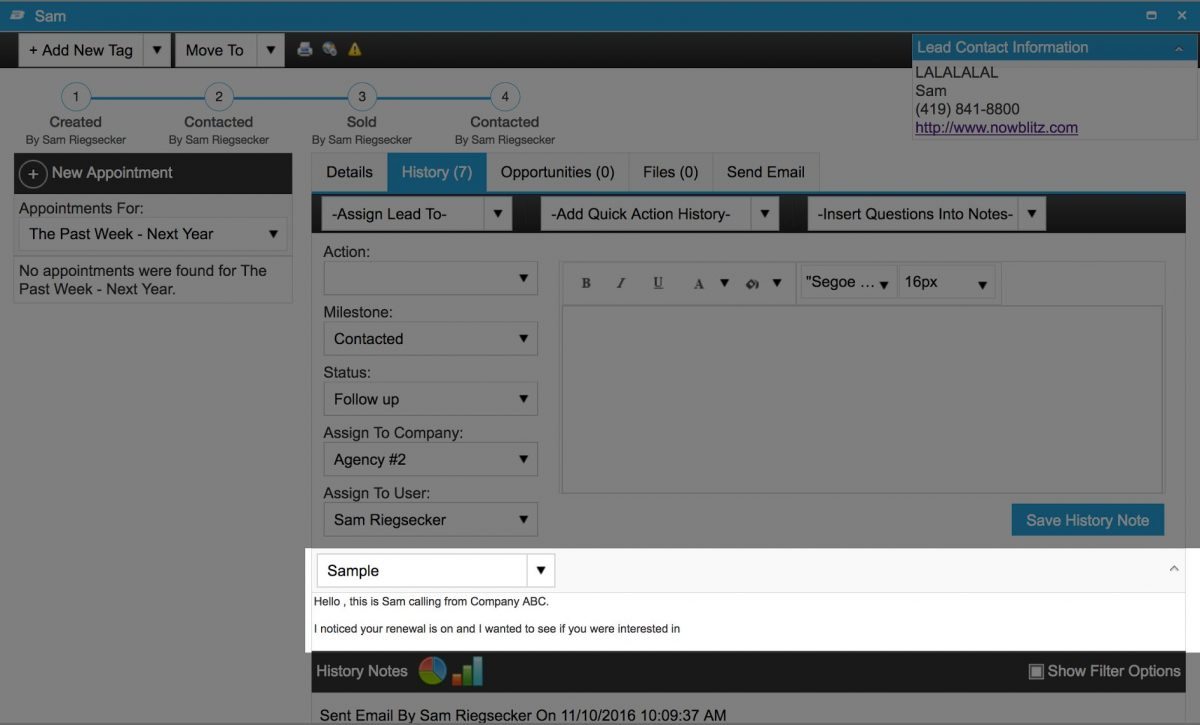
Click here for more information regarding Call Scripts.
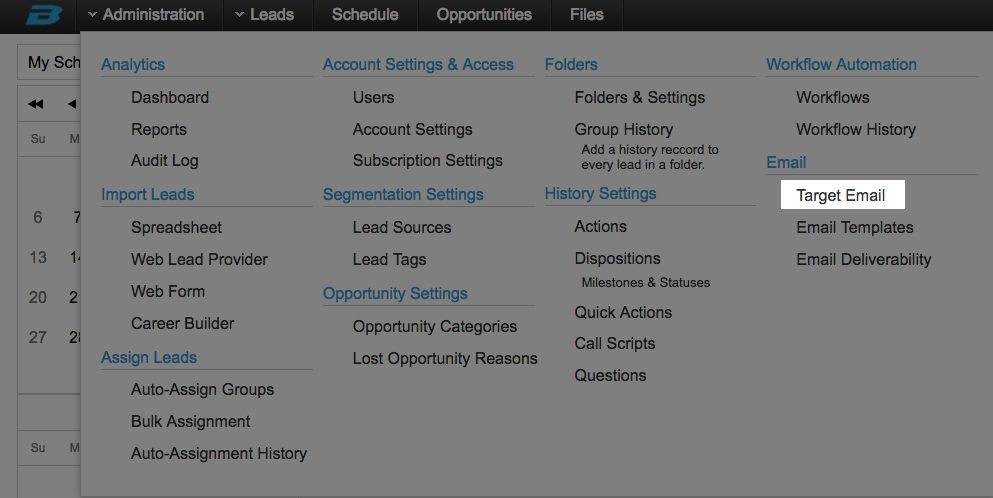
Target Email
Target Email (previously “Campaign Email”), along with a more detailed Email Deliverability report, can be found under the Email section of the Admin Tab. Target emailing is more focused than ever before. As seen below, we have created a simple 3 step process to send out email blasts to make your job easier.

Click here for more information on how to use the Target Email feature.
Click here to read on the email policy that Blitz Contact Manager has on this feature.
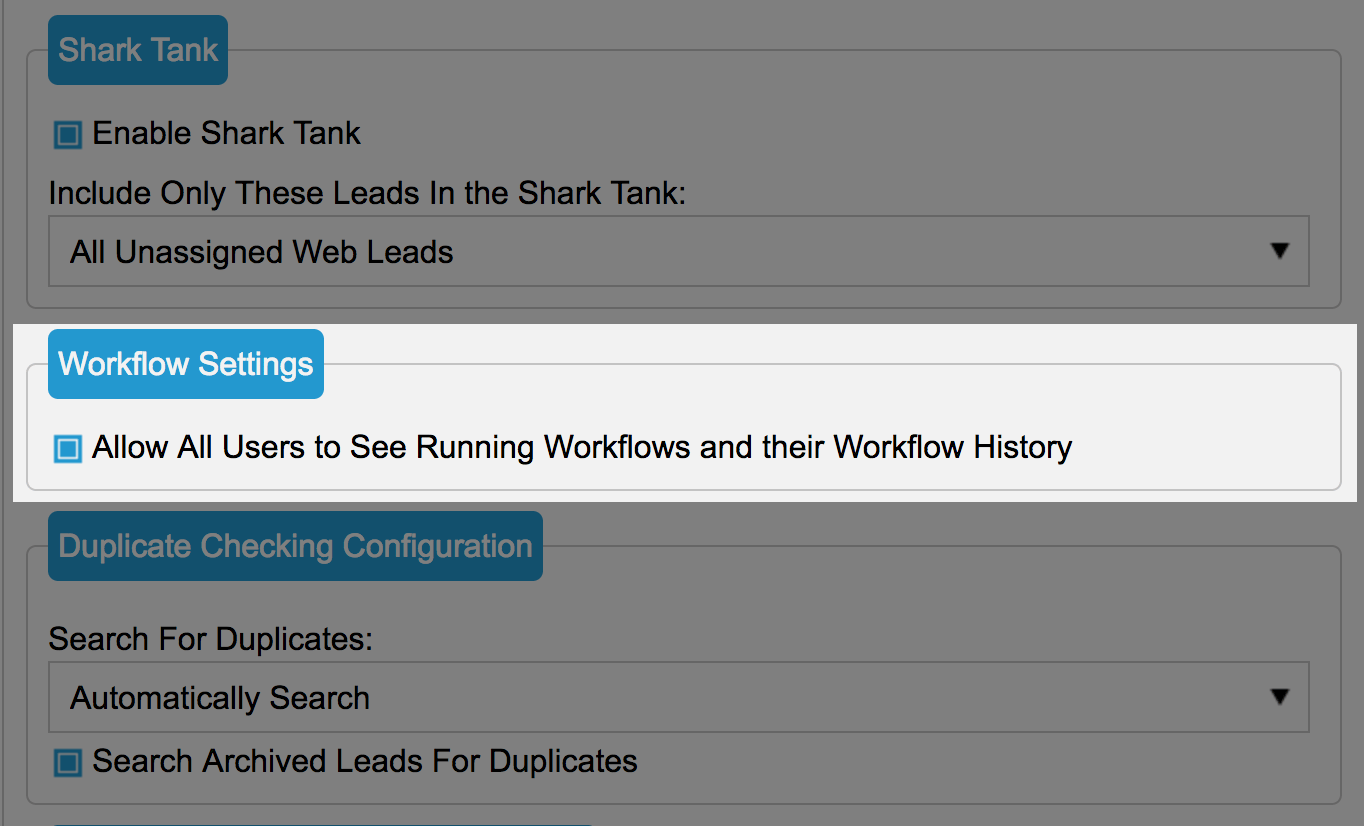
Account Settings – Workflow Settings
An additional setting has been added to Account Settings screen (previously “My Company”). Users are now able to view running Workflows under the Leads menu, giving them more visibility to your sales follow up process. By default, the setting is enabled. If you would like to disable the feature, you can by unchecking the box under “Workflow Settings”. More information on this feature is below under the Leads Menu

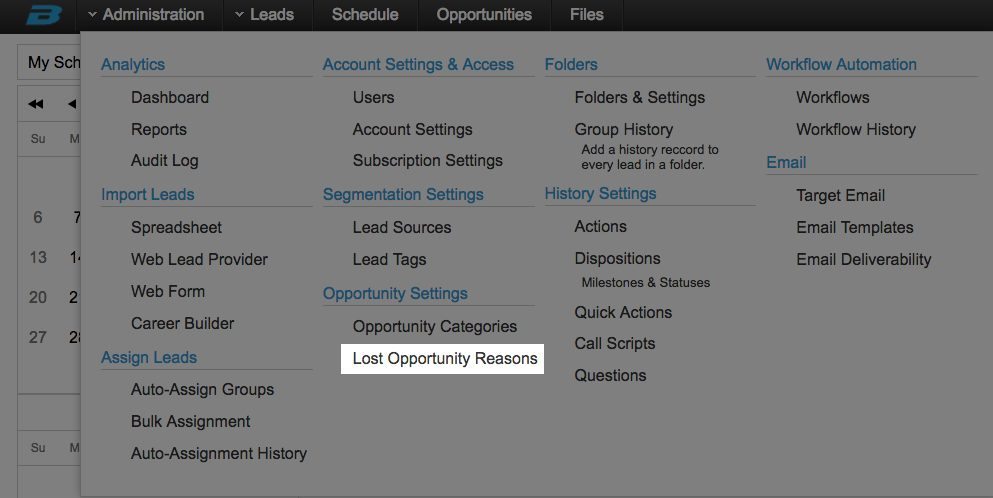
Lost Opportunity Reasons
As described above in the Opportunity updates section, users now will select a reason from a drop down when an Opportunity is marked “Lost”. The Lost Opportunity Reasons can be customized under the Opportunity Settings section in the Admin tab, as shown below. Being able to fully customize your lost opportunities is important to better understand why you’re losing business, so you can improve your strategy.
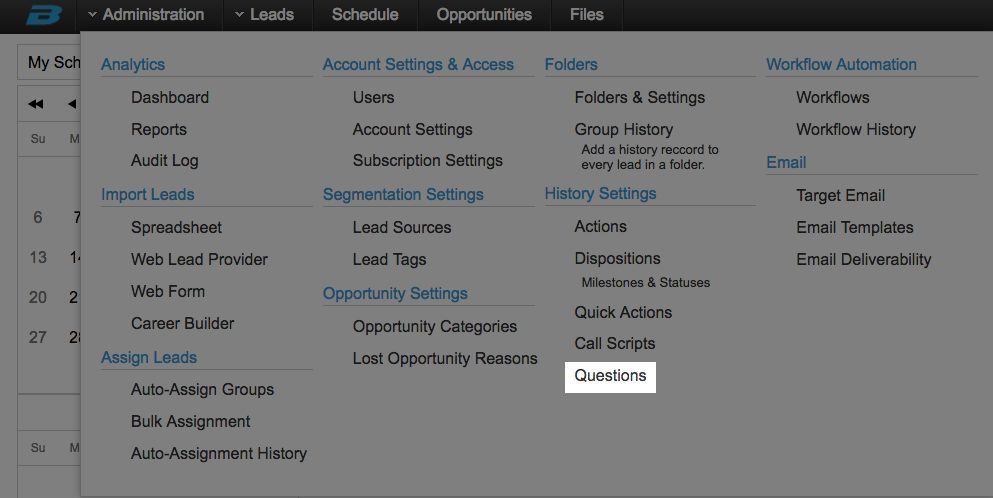
Questions
Previously, Questions were associated with a folder (previously “campaign”), and could be found under the folder’s settings. Questions settings are now available in the Admin Tab, making them easier to access. Questions are similar to a call script, but display within the history note text box so a user can fill it out as a form while on a call.
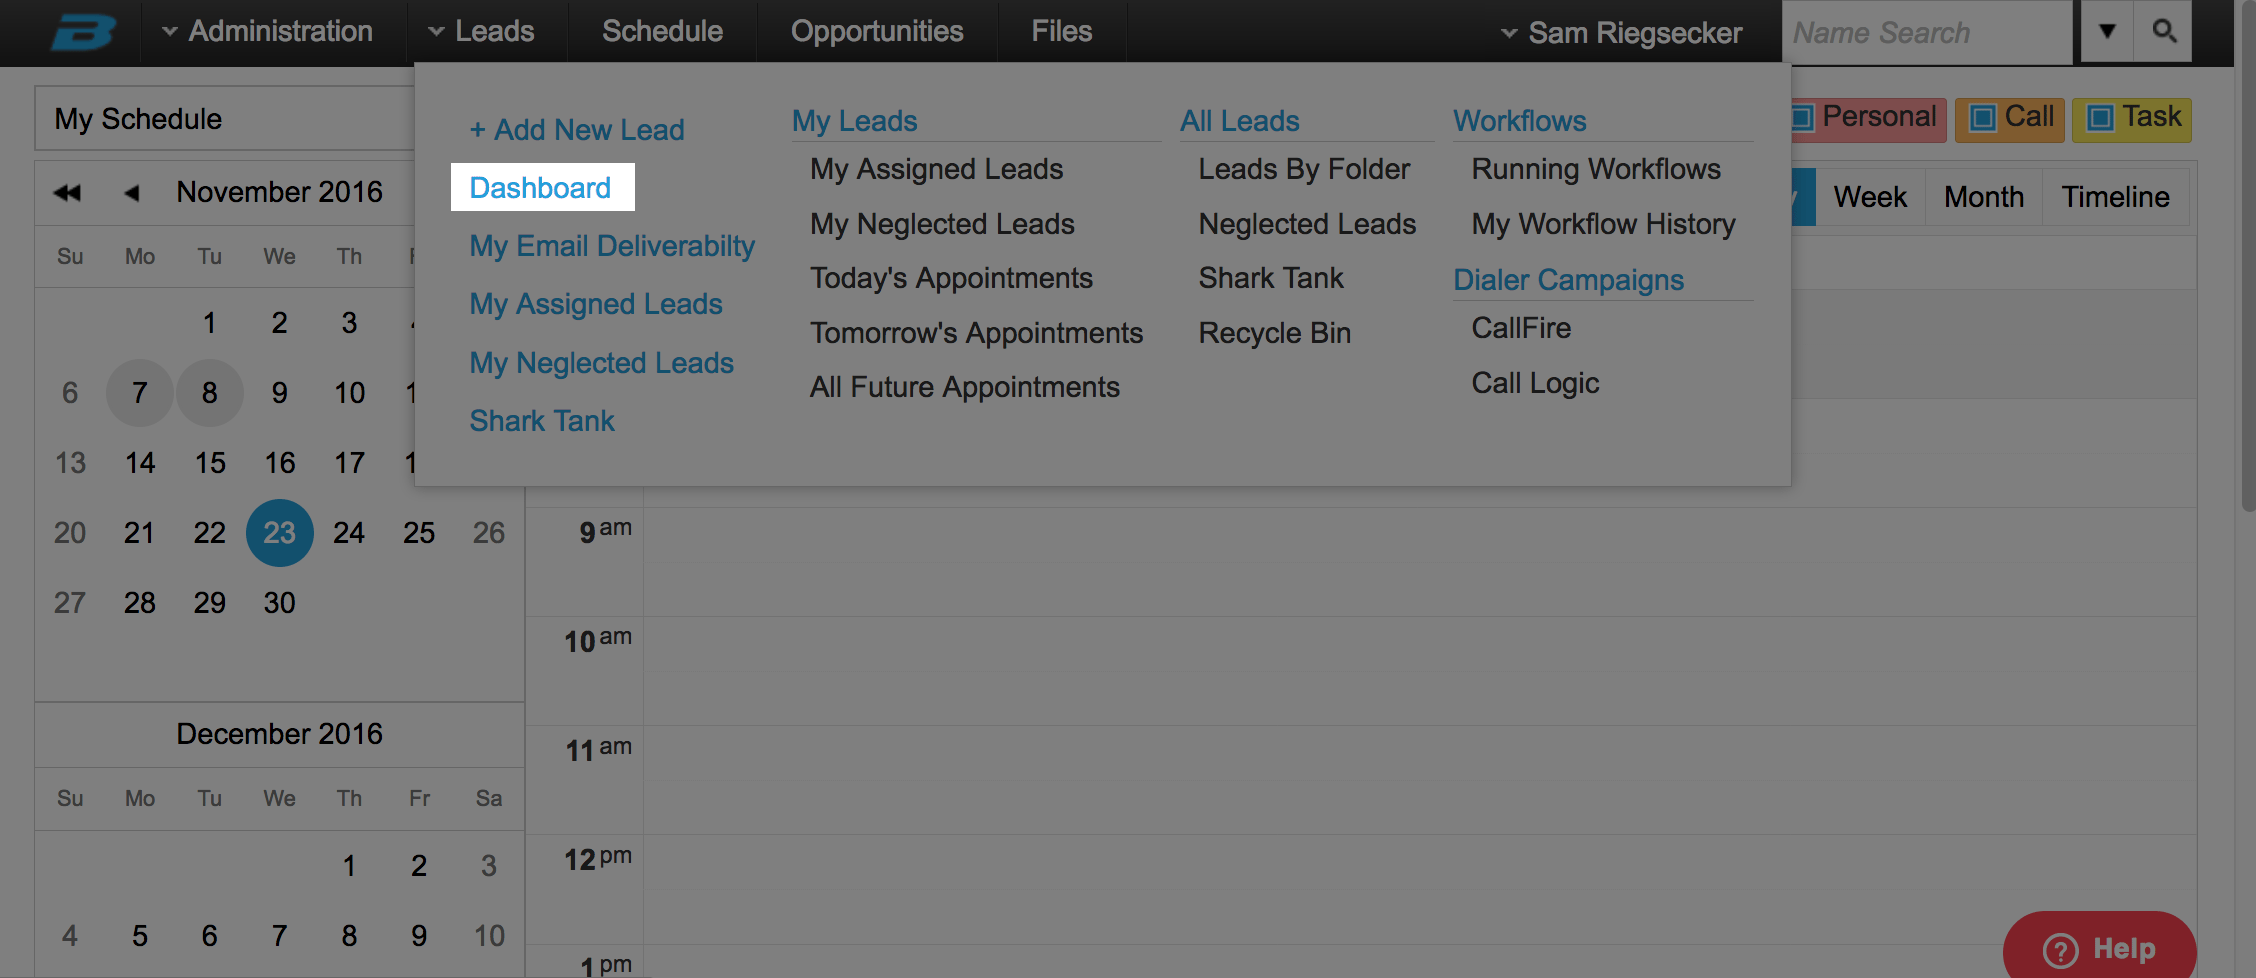
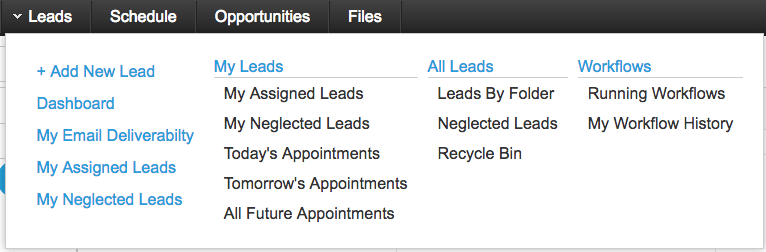
The Leads menu has also been reorganized to make navigating simpler for users, with easier to find information and better labeled menu items.
- The first column on the left displays featured, or most used, links.
- The “My Leads” section displays only leads assigned to the user logged in.
- The “All Leads” section displays leads assigned to any user. To view a Folder (previously “Campaign”), select “Leads By Folder” then choose the Folder you would like to view.
- The “Workflows” section displays Workflow information for users, which was previously only available for admins.
- If you are using an auto dialer, there will be a “Dialer Campaigns” section available under the “Workflows” section.
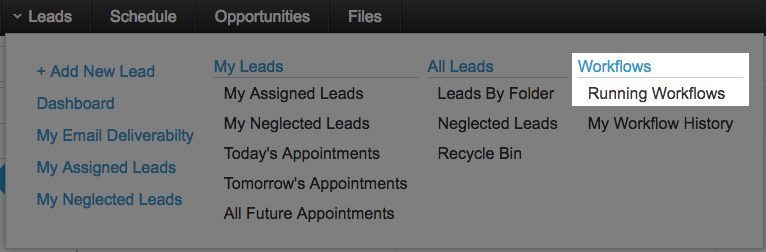
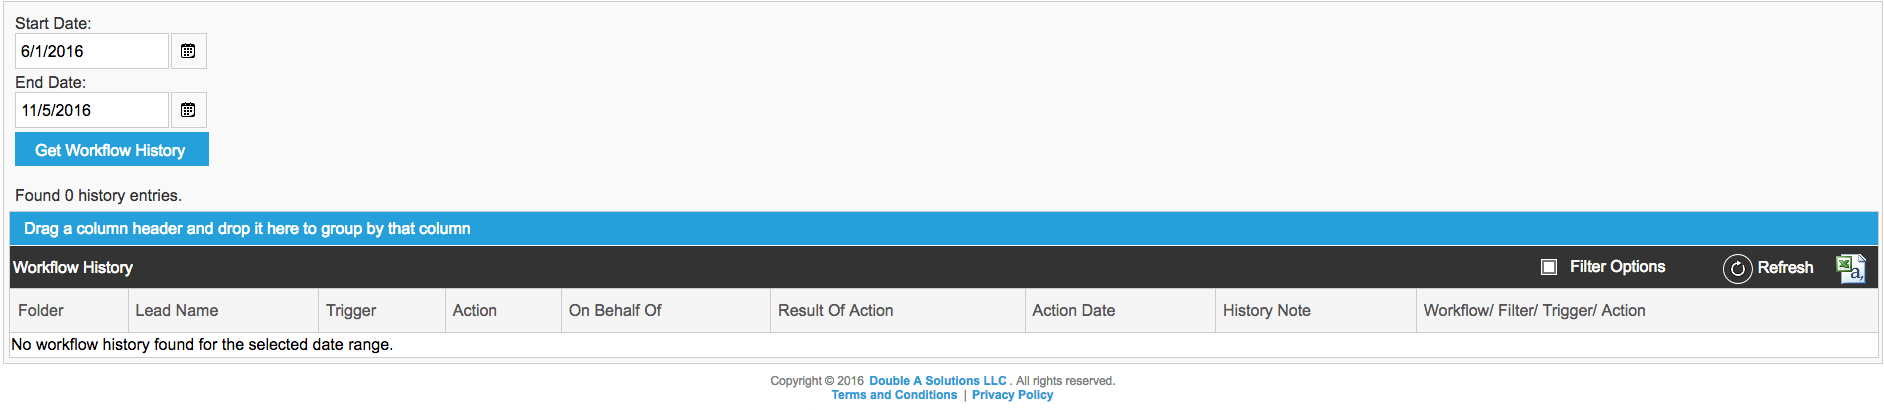
Workflows
- Running workflows is a new feature that gives users the ability to see which workflows are currently running in Blitz. When opened, the user can see a read only view of the Workflows that are unpaused (only Admins can see paused Workflows).
- Workflows are now displayed in expandable menus. When opened, it shows a detailed description of the filters, triggers, and actions associated with the Workflow.

- In My Workflow History, the user can see a report of the actions Workflow has generated over a certain period of time.
- Having the ability to filter the report puts the power in the hands of the user to find exactly the information they are looking for with their workflow history.
- After filtering, this feature also gives you the ability to export into a spreadsheet format (found on the far right side of the Workflow History heading).

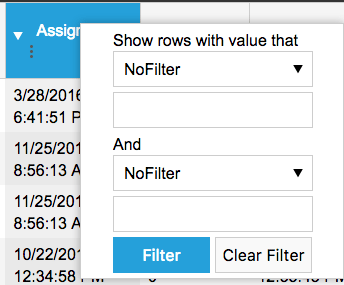
Filtering
Blitz’s filtering system has been updated to be more robust than ever before. Filtering options now have more of an excel-like look, which is more familiar to most users. When selecting the column you want to filter, just click the three dots in the header of the column to open the filtering options. When selecting check boxes, multiple can be values can be chosen before the system runs the filter, drastically increasing the speed. Our filtering system offers two different options to filter your list by:
![]()
- The new check box filtering approach is below. In this window, your filters will be available to choose by selecting the box. You can select more than one option to filter or just a single object to filter by selecting only one box.

- The second way to filter is with “fill in” options. The great thing about this filter option is that now you have the ability to filter by more than one value, or between certain dates.